Through the previous article, we have initially learned how to use Compose to make loading animations. To consolidate this knowledge, in this article we will continue to use Compose to make a few more loading animations and deepen the impression. The article is relatively long and you can choose the animations you are interested in to read.
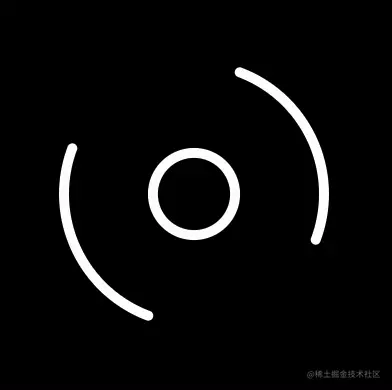
Arcs and Circles
I don't know what to call this animation, so I just named it randomly. The whole animation process is still quite simple. It consists of two parts: one part is two arcs revolving around the center at speeds from fast to slow, and the other part is a hollow circle in the center whose radius is oscillating between lengthening and shortening in a loop. So basically two cyclic animations can complete it. First we need to define the variables needed for the animation:
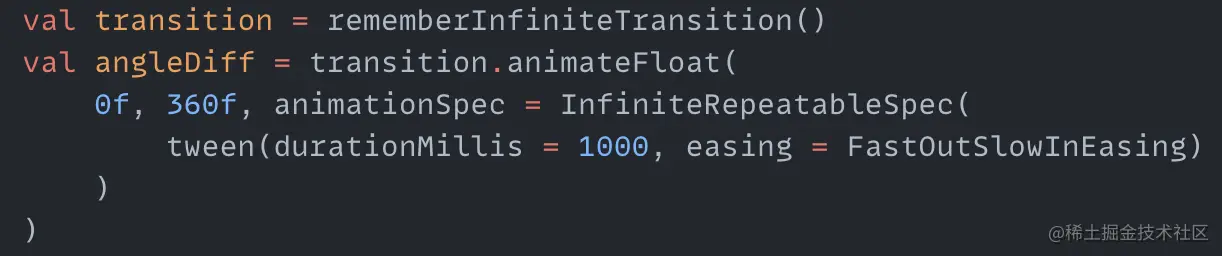
centerX and centerY are the coordinates of the center of the animation, radius is the radius for drawing the two arcs. Then we create a cyclic animation with values from 0 degrees to 360 degrees:
Here we use FastOutSlowInEasing for the speed variation to make the arcs rotate from fast to slow. Next we draw the two arcs in Canvas:
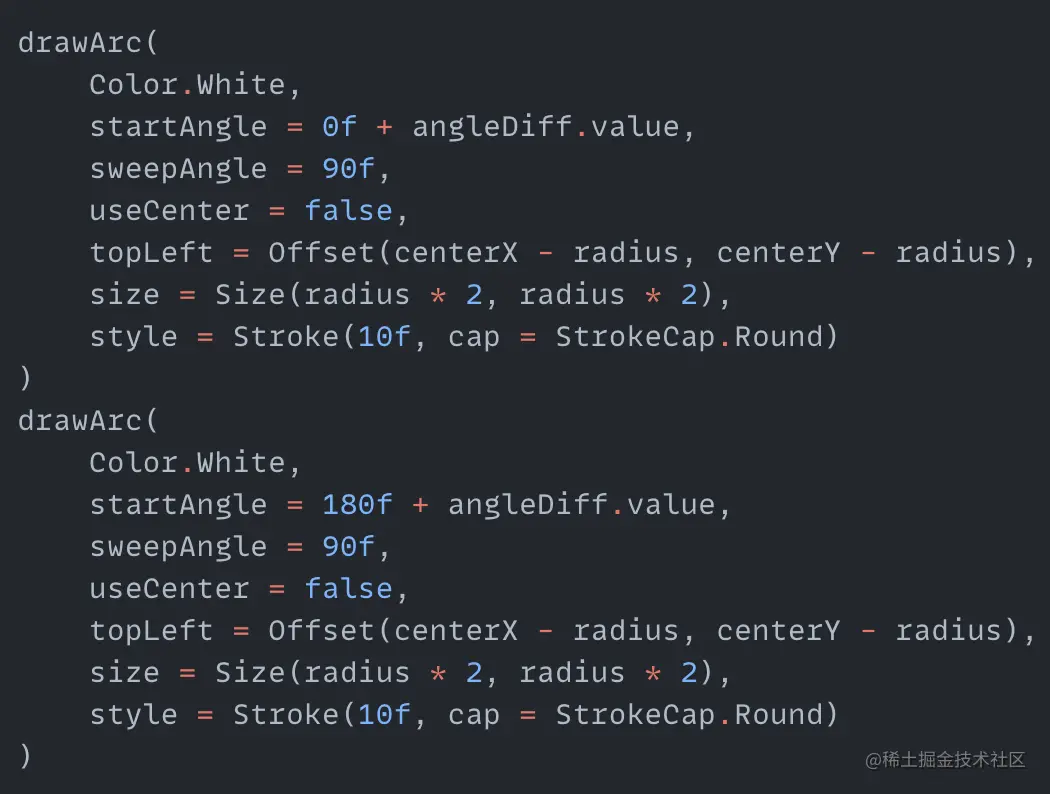
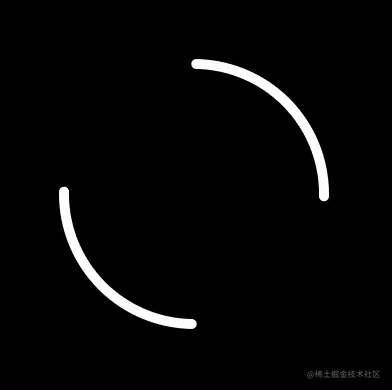
Just draw two fan shapes, and add the angleDiff change value to startAngle. The two arcs can rotate. The effect is as follows:
Next is the expanding and contracting hollow circle in the middle, which is also a cyclic process. We create another cyclic animation with the range oscillating between 20f and 60f:
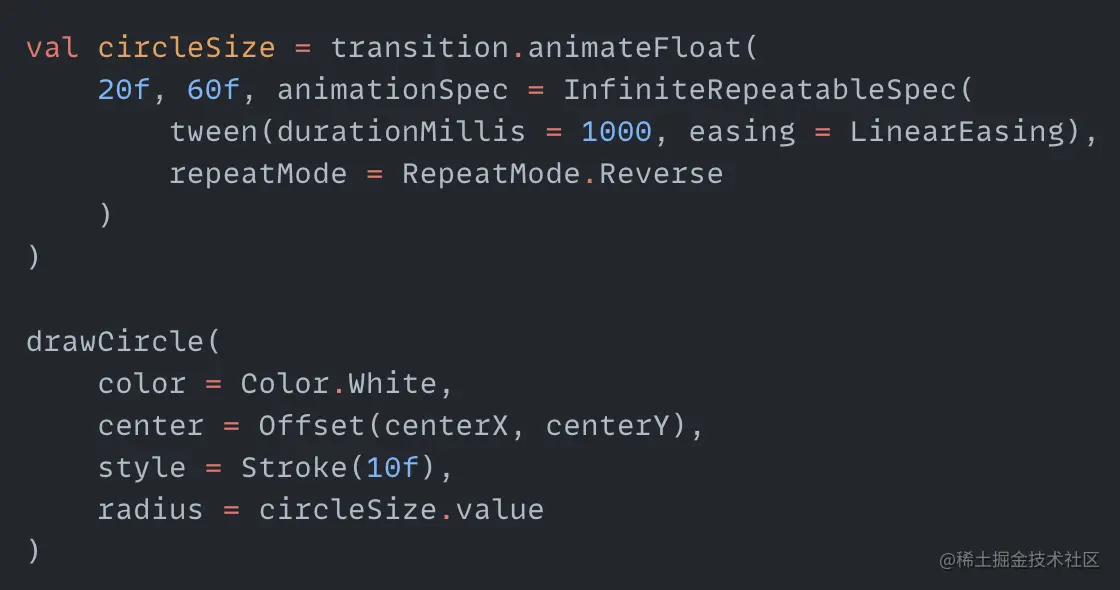
circleSize is the radius of the middle circle we draw. The final effect is as follows:
Rotating Balls
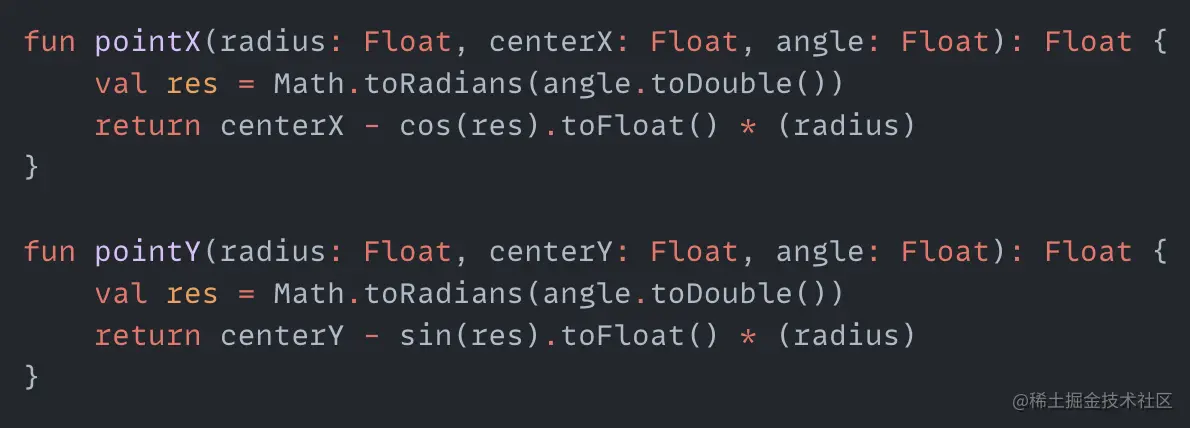
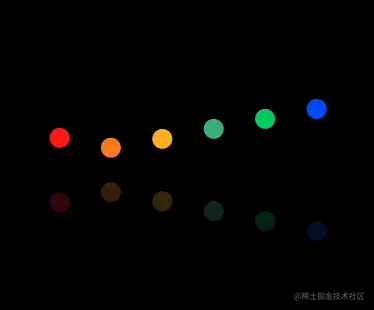
This animation has something in common with the previous one, which is that the distance between the ball and the center also oscillates within a range while the ball revolves around the center. However, the difference is that when the ball is far away from the center, it rotates a certain angle, and when it is close to the center, the three balls do not rotate. Here we use the method of adding a time difference between animations. After analyzing it, as usual, we first create the necessary variables:
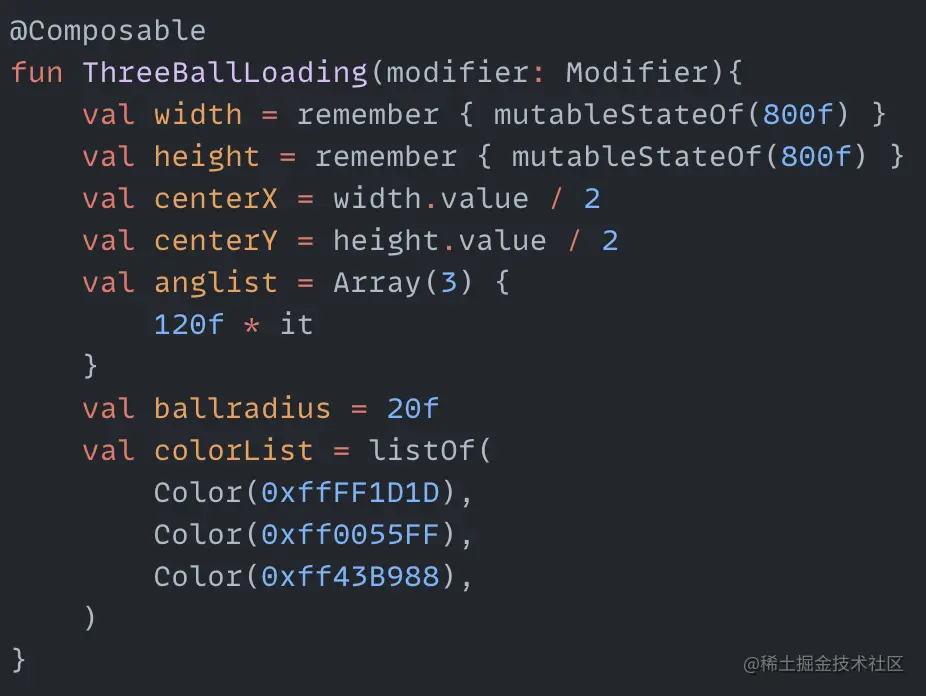
The center point coordinates centerX and centerY are essential for circular motion. anglist stores the angles for drawing the balls. ballradius is the radius of each ball. colorList is the color of the balls. First, create a cyclic animation with the range varying from half the ball radius to four times the ball radius:
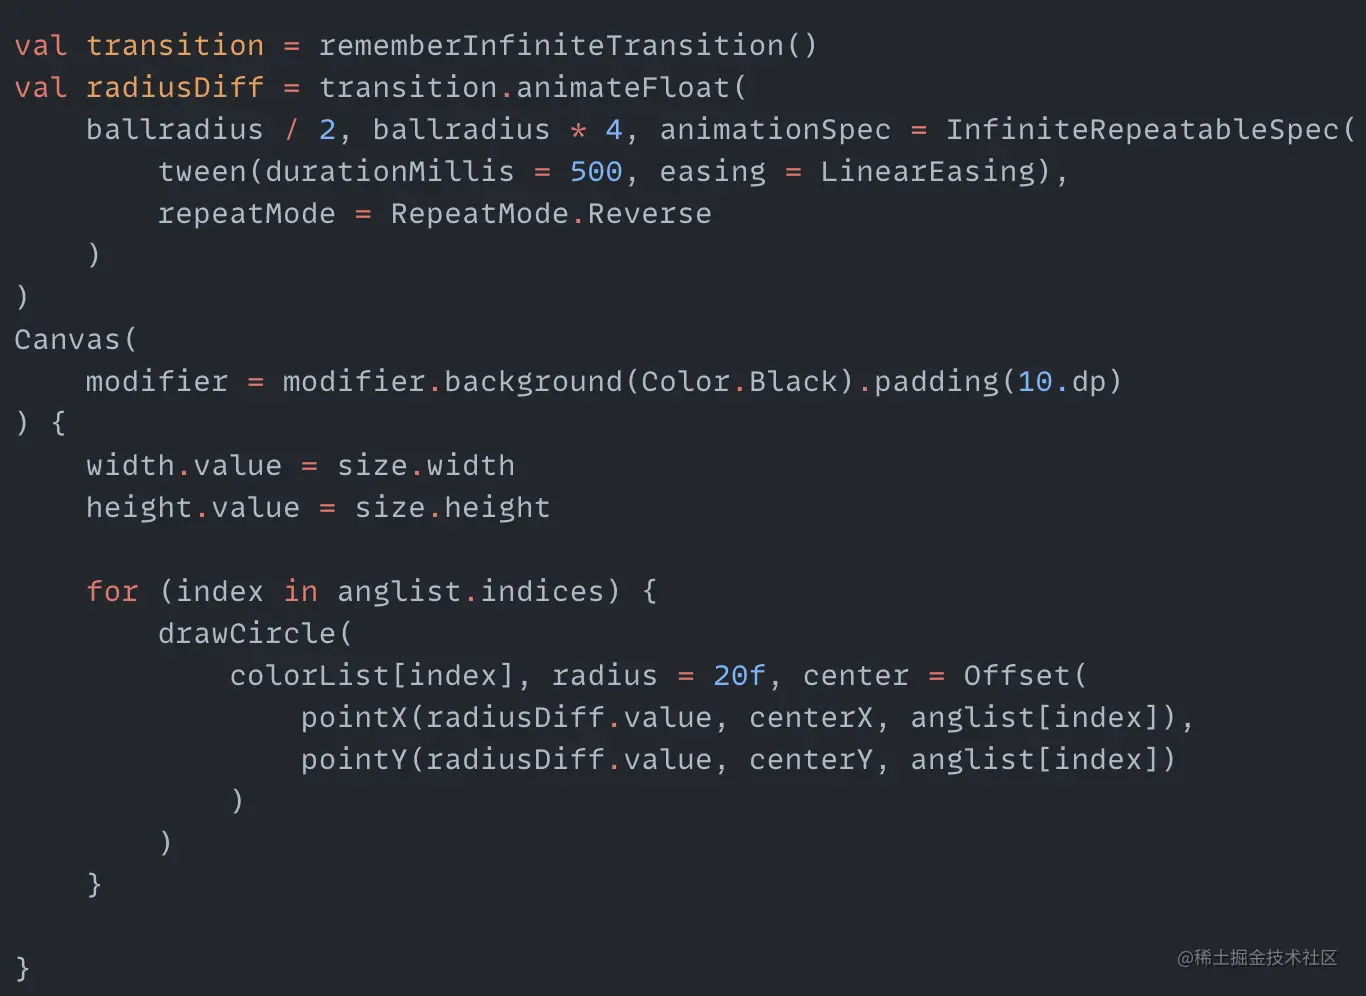
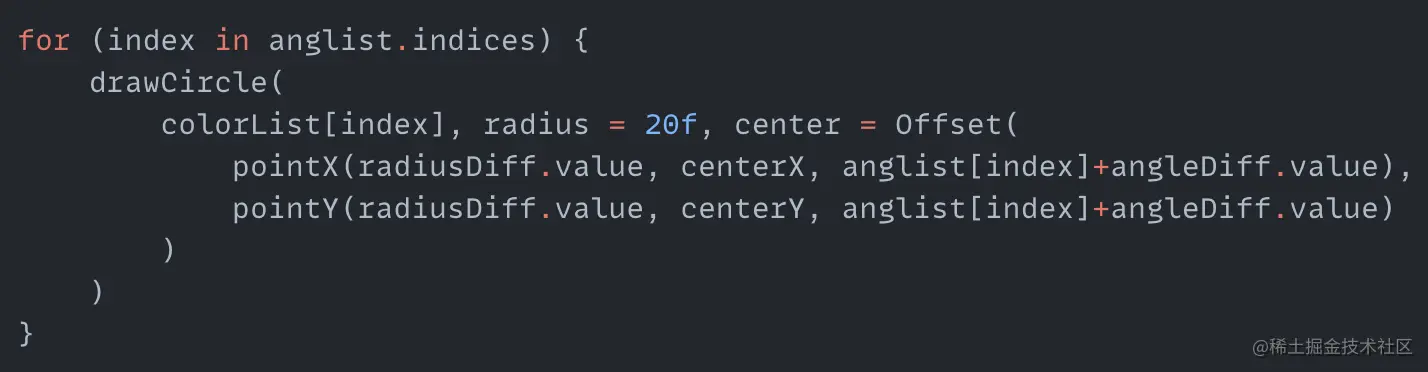
radiusDiff is the distance between the ball and the canvas center. Calculate the center coordinates pointX and pointY of the ball at a certain angle. Finally use the drawCircle function to draw the ball. The code for pointX and pointY is as follows:
Now the ball can achieve the animation of changing distance with the canvas center. See the effect below:
Next, make the balls rotate, and only rotate when the balls are far away from the center, not rotating when close to the center. To achieve this, we said earlier that we need to utilize a time difference. We know that the duration for radiusDiff to change is 500 milliseconds in one direction, so the duration for a ball to rotate once is also 500 milliseconds. Then the next rotation time should be the ball rotation time plus 500 milliseconds, because the ball also has the process of approaching the center. So here we use a Flow to create a timer to trigger ball rotation periodically.
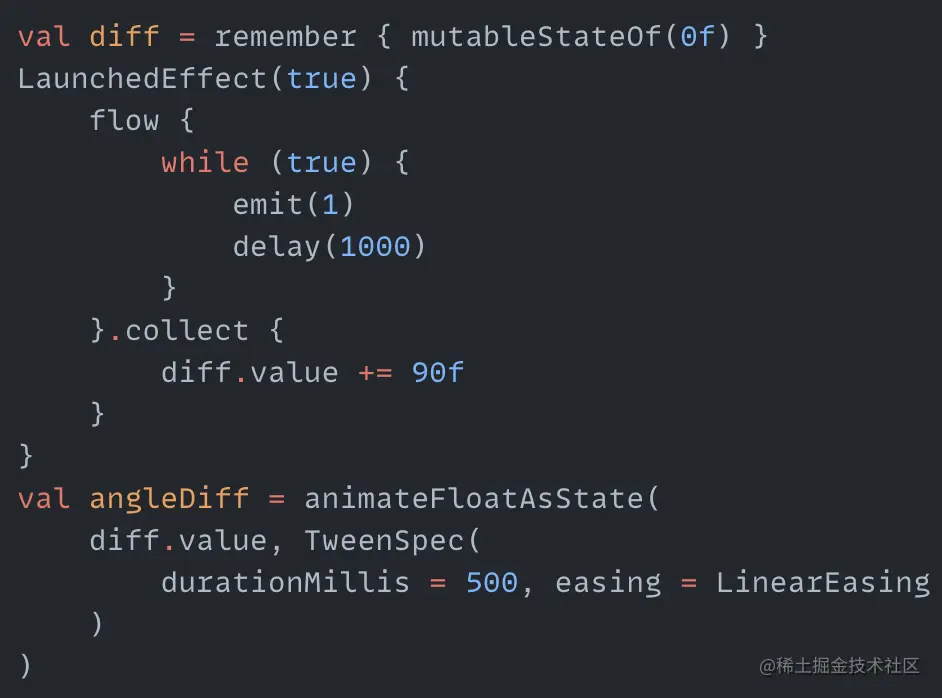
diff increments 90 degrees every second. angleDiff is the animation process of this angle increment. We add the angleDiff variable to the process of calculating the ball center, and the whole animation of the balls is completed.
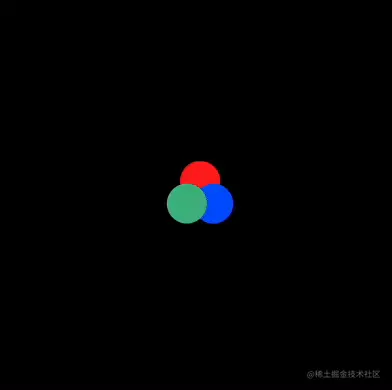
More Rotating Balls
Let's make another rotating ball animation, but here the distance between the balls and the center remains unchanged. What changes are the radius and opacity of the balls themselves. The desired effect is that when the ball rotates, its own radius increases from small to large and then decreases again, and the opacity also changes from light to dark and then light again. So this is a cyclic process, and we need to create two cyclic animations with repeatMode defined as Reverse:

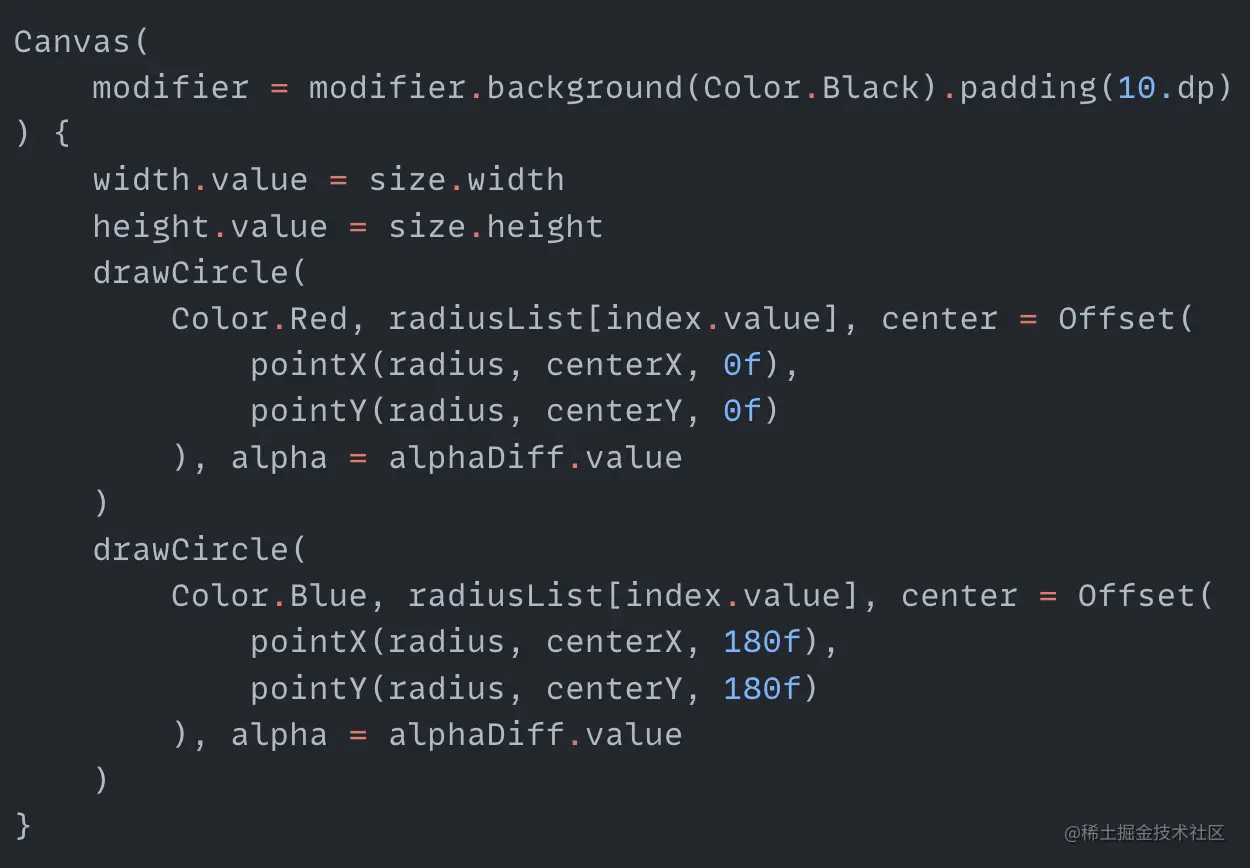
index is the index value of radiusList that changes continuously. alphaDiff is the continuously changing opacity value. Now we can draw two non-rotating balls with radius and opacity changing:

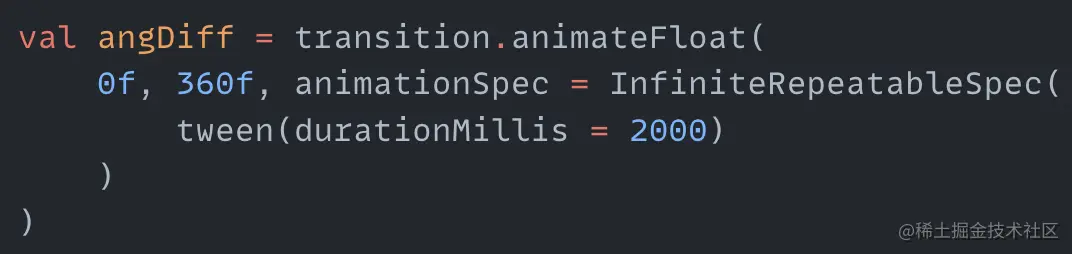
Then make the balls rotate around the center. This is also a cyclic animation with the angle from 0 to 180 degrees. Note that the animation duration needs attention here. Since the previous single radius and opacity change process is set to 1 second, and because these two animations are Reverse, the complete animation takes 2 seconds. So the duration of the balls rotating around the center should also be set to 2 seconds:
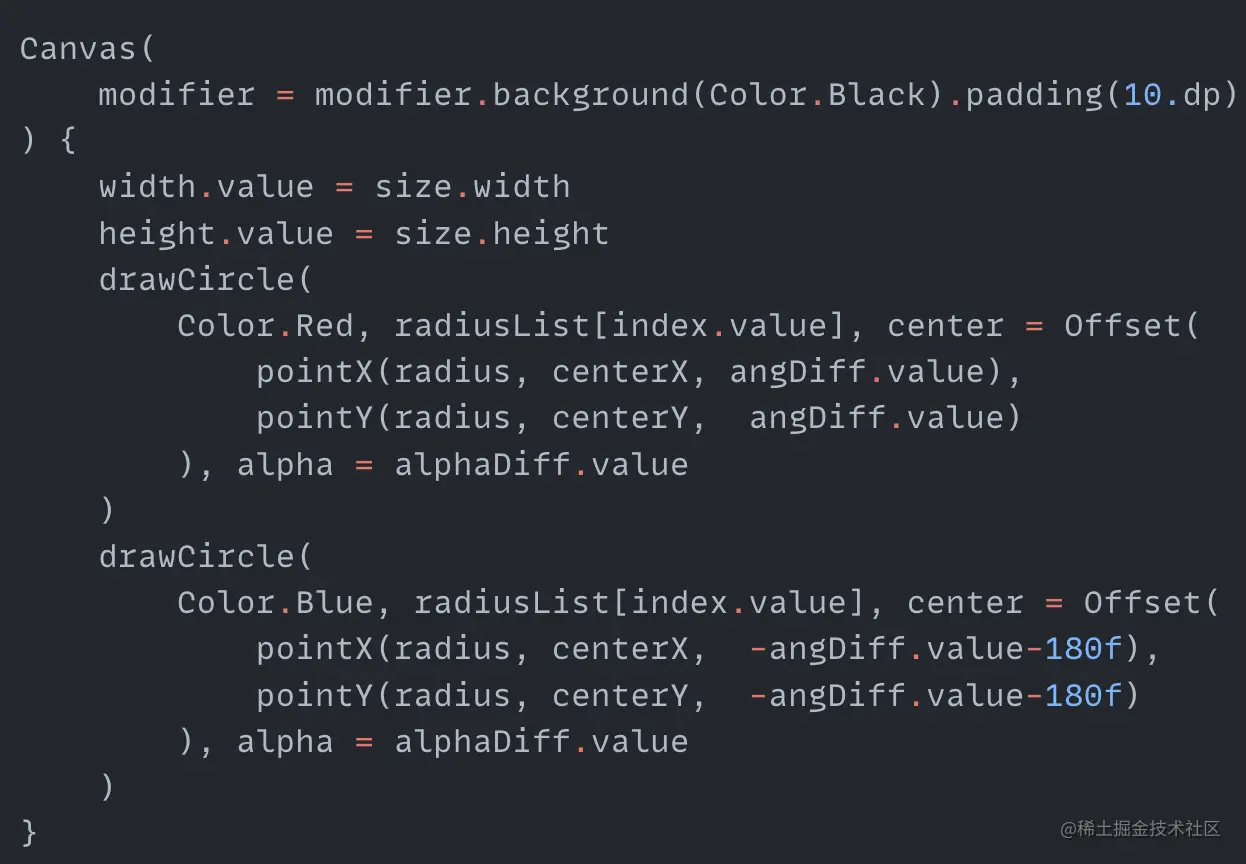
Then replace the angle used to draw the circles with angDiff. Note that the angles set for the two circles must be opposite so that they can rotate in opposite directions when rotating.
Now a complete animation is done. See the final version below:
Beating Heart
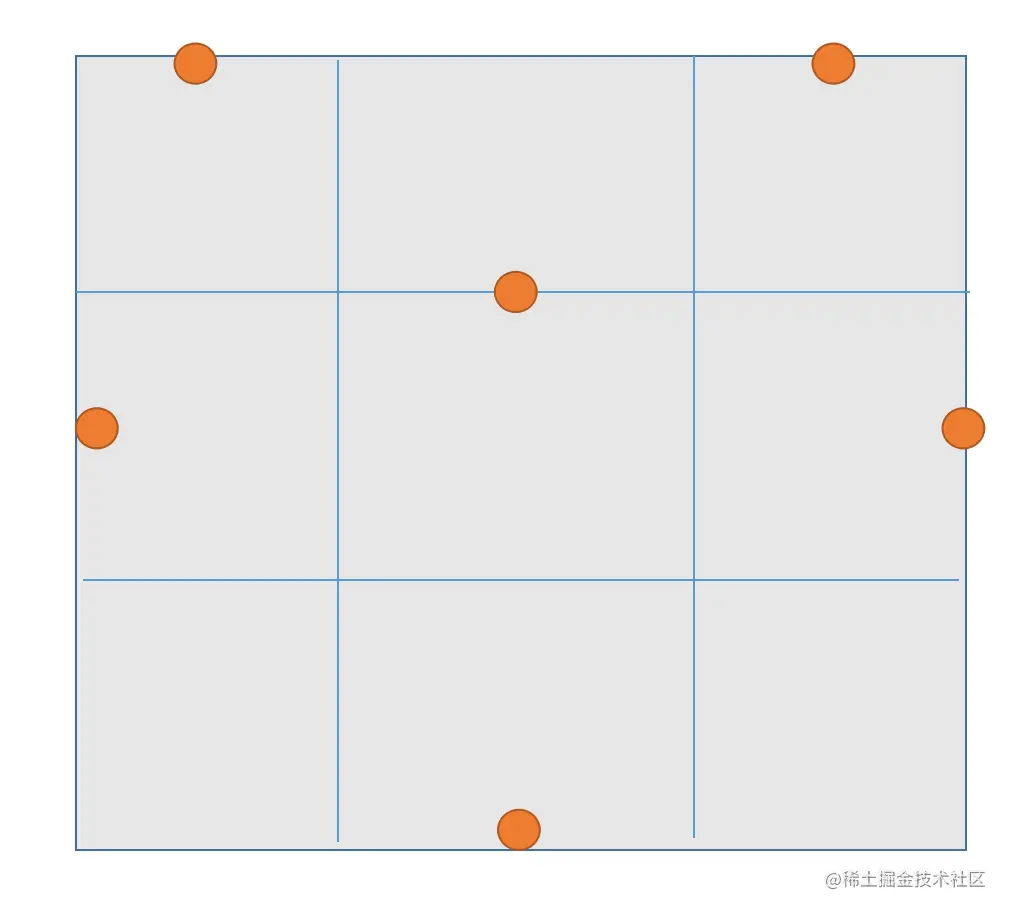
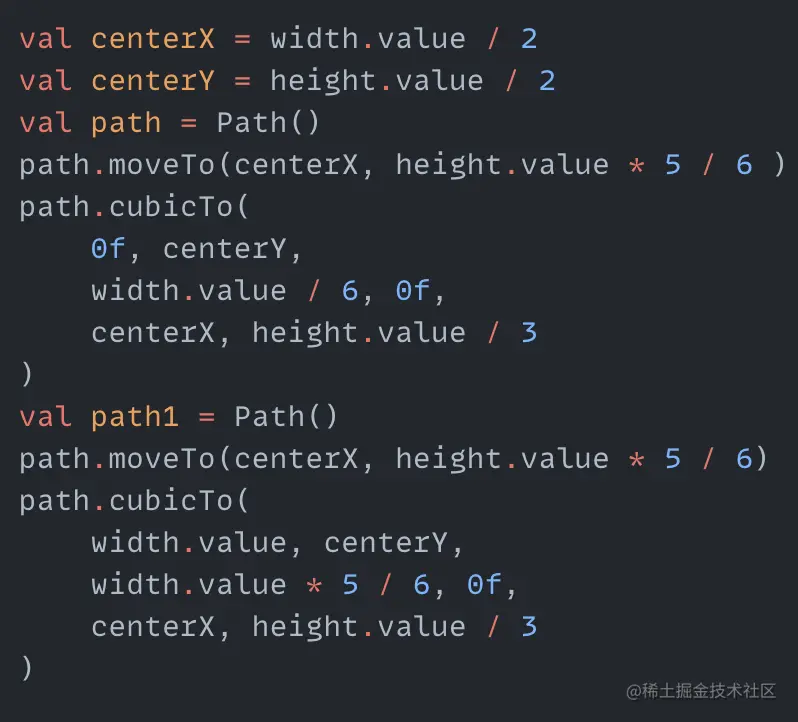
This animation needs to consider two parts: how to draw a heart shape and how to make the heart beat. If you simply want to draw a heart shape in one stroke, there may be no API provided for us. But we can imagine that if a heart is divided in half, isn't it equal to drawing two cubic Bezier curves? So the first step is to determine the control points of the Bezier curve. If we divide the canvas into a 3*3 grid layout, then our control points are in the following positions:
Knowing the positions of the control points, we can create the Path for the two curves:
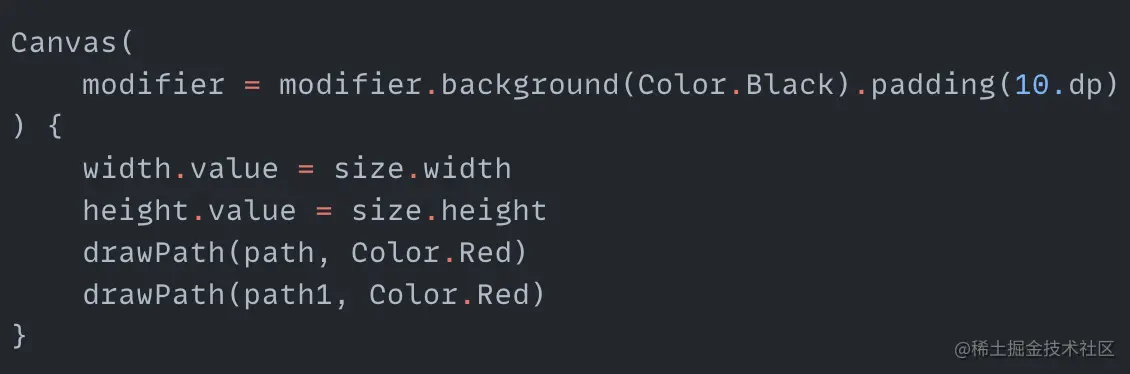
After drawing on the canvas, we get a red heart:

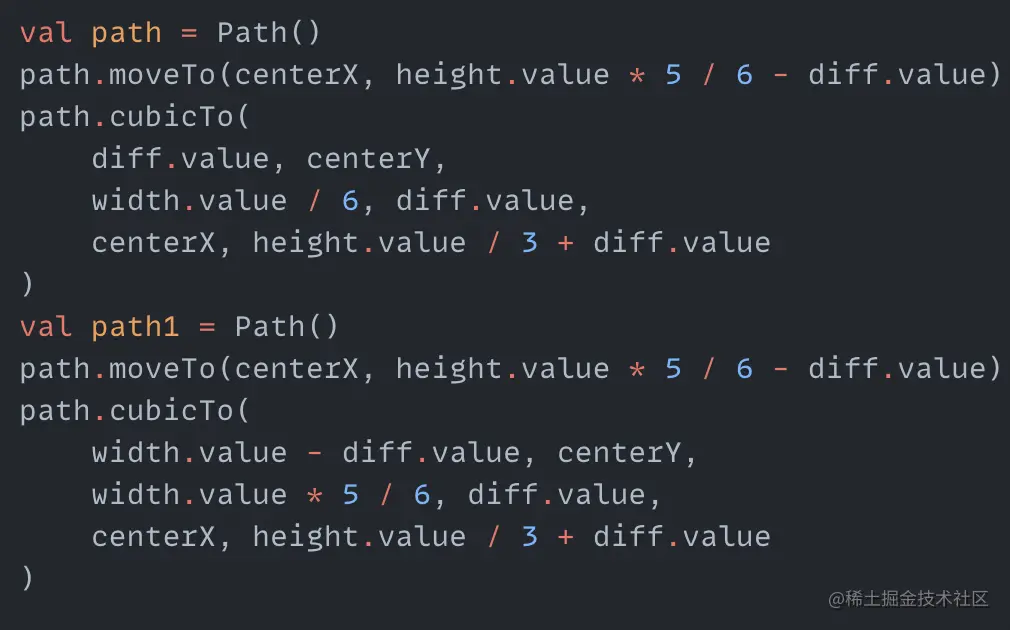
After the heart shape is drawn, we need to consider how to make the heart beat. The beating is actually to change the coordinates of the control points used to draw the heart. If all control points change within a coordinate range in a loop, then the heart seems to have a beating effect. So first create a cyclic animation with the changing range from 0f to 15f:
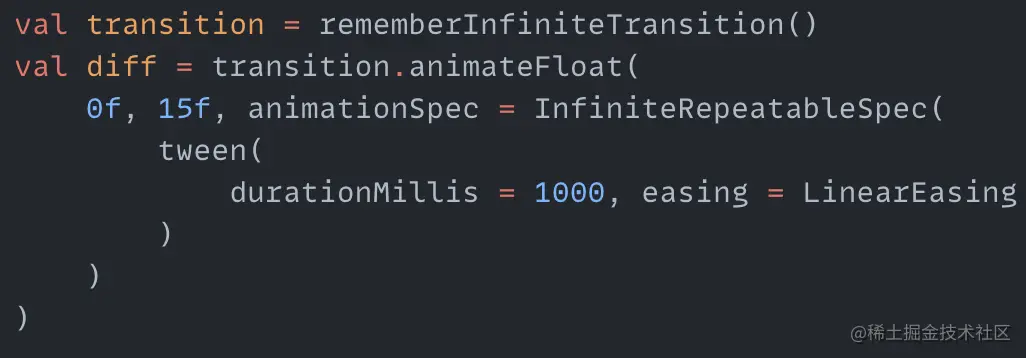
Then substitute this changing value diff into the corresponding coordinates when creating the Path. The code after substitution is as follows:
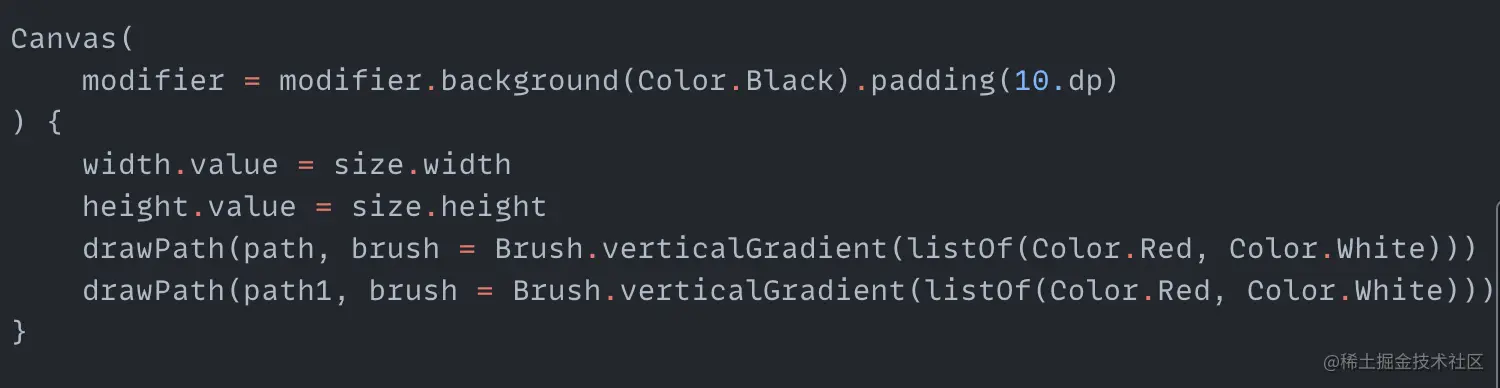
Now run it again to get a beating heart:

Add some color gradients to make the heart look a little three-dimensional, and get the final effect:

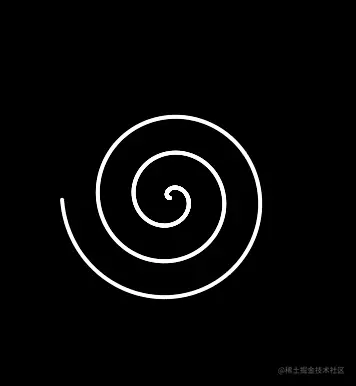
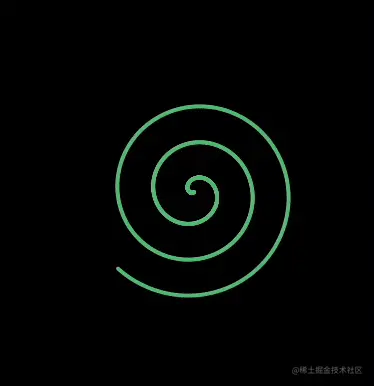
Colorful Spiral
The main thing about this effect is knowing how to draw a spiral. A spiral is actually several circles with centers gradually moving away from the center point, and rotation angles also gradually increasing combined together. So to draw a spiral, we first need to have all the radii and rotation angles:

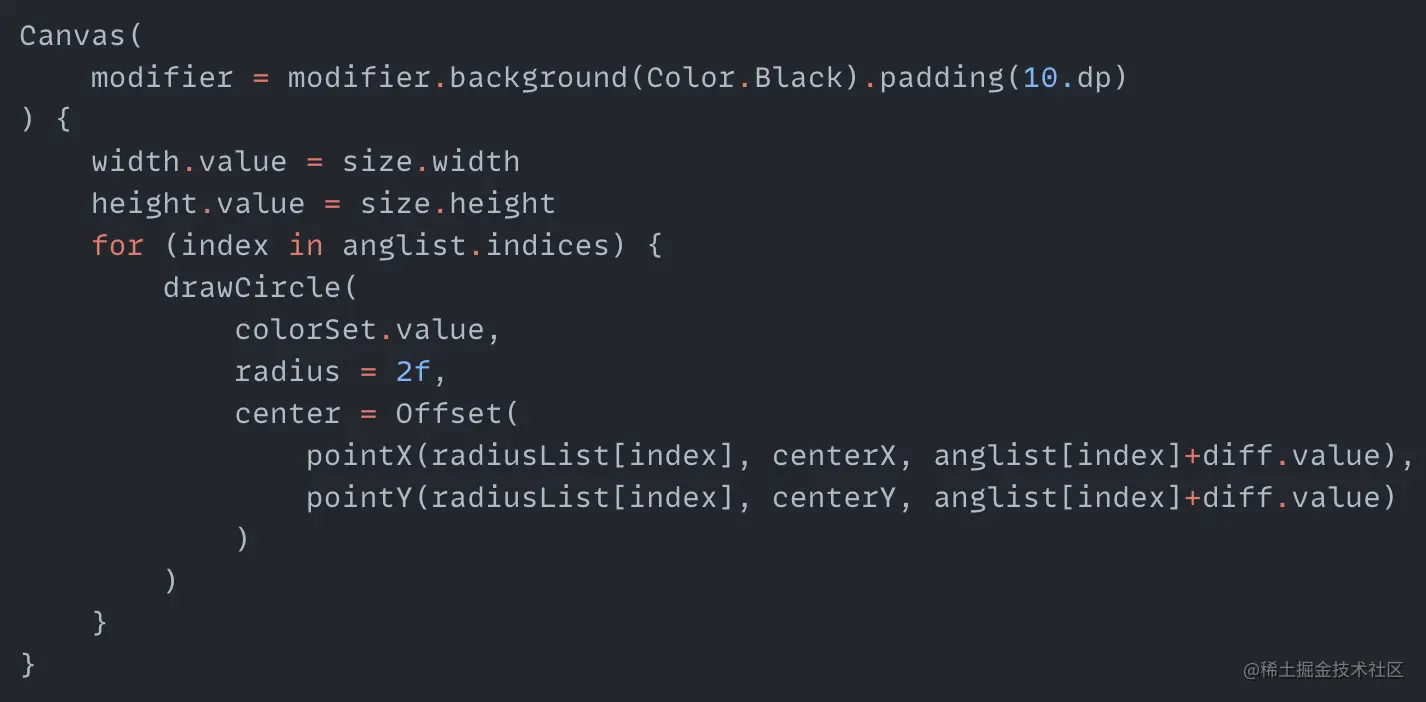
radiusList stores all the distances to the center, anglist saves all the rotation angles. We can traverse any array to get the angle and distance to the center, then calculate the center coordinates of the corresponding circle. After drawing all the circle points, we get the spiral we want:
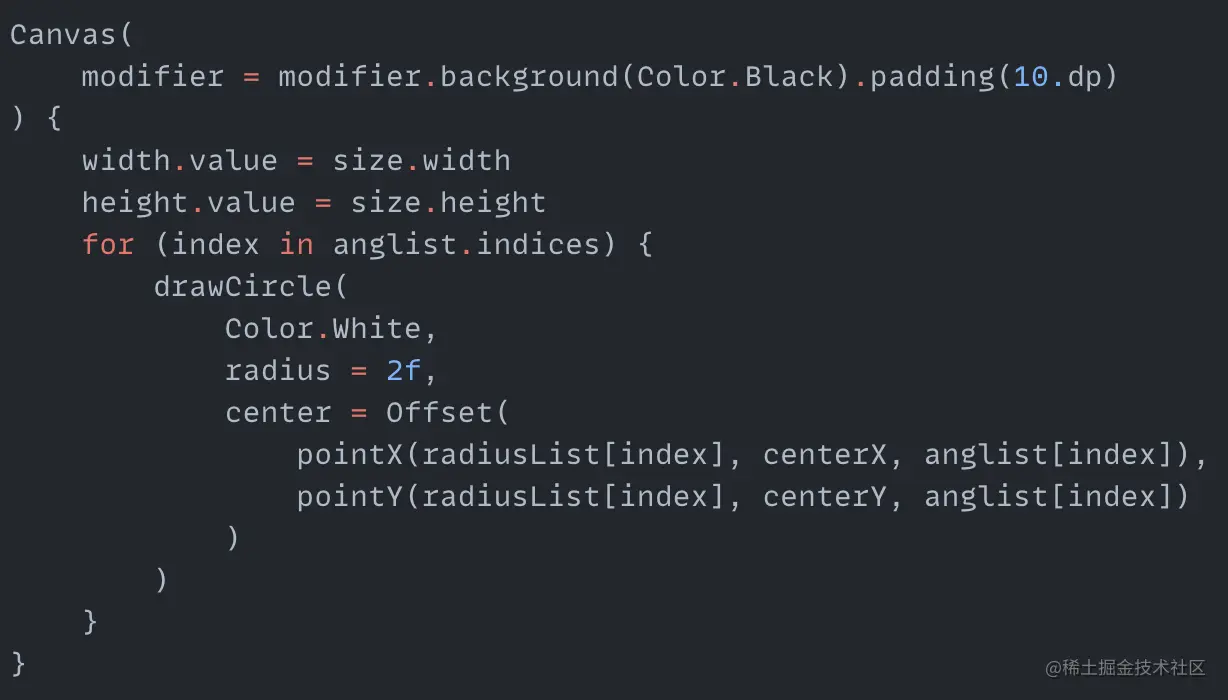
pointX and pointY are familiar to us, they are functions to calculate the center coordinates of the circle points. After running we get a static spiral pattern:
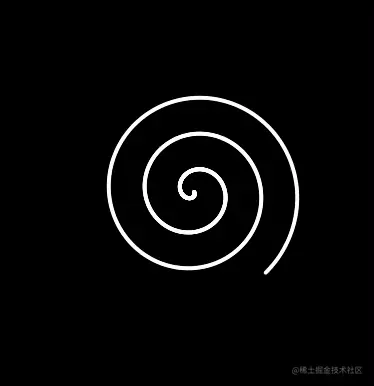
Then we need to rotate this spiral. This is simple, just continuously change the startAngle value of each circle point, and the overall spiral will rotate:
Then add the changing value diff to the angle of each circle point, and the spiral starts rotating:
Then color the spiral. The coloring method is also to traverse a color value array and constantly take colors from the array to display on the spiral. When displaying, we use the animateColorAsState function to add an animated transition effect when switching between colors. The code is as follows:
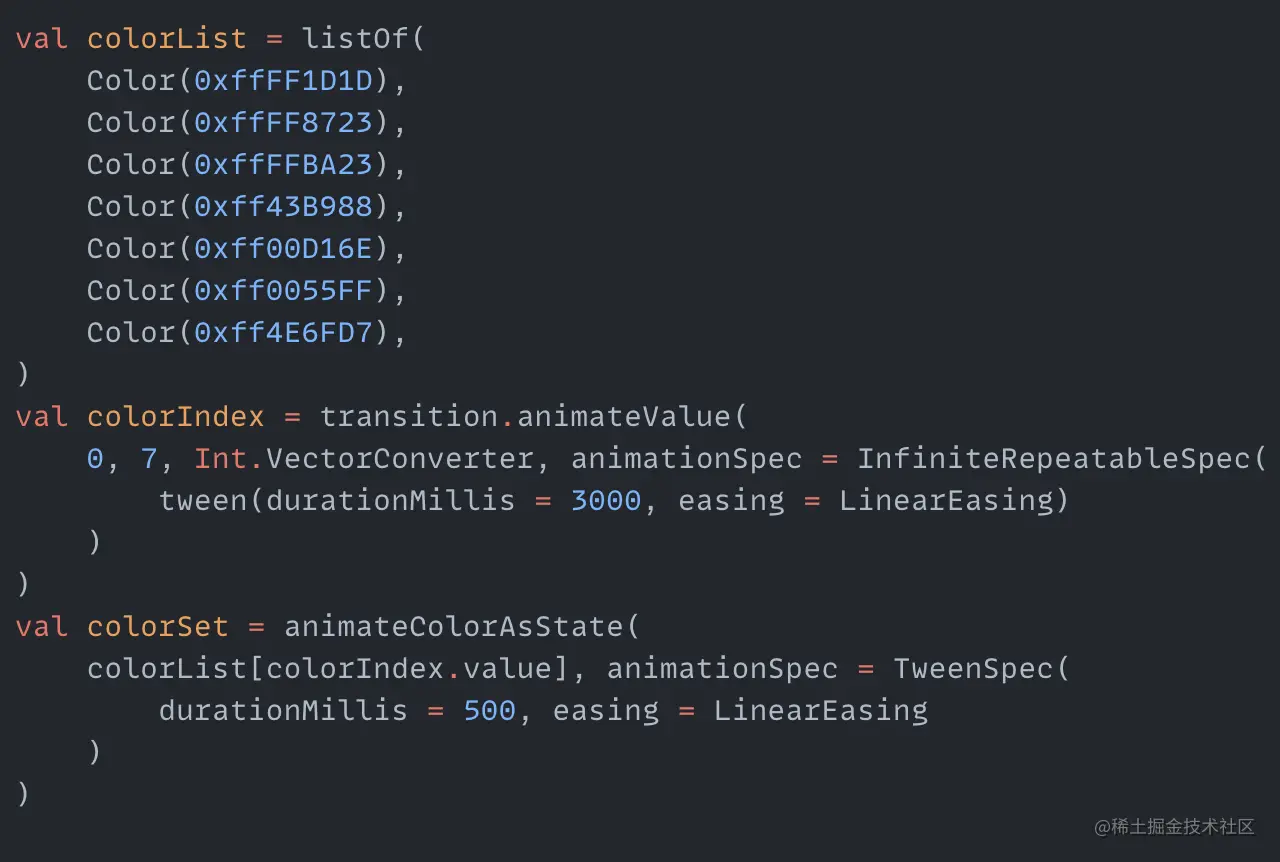
Here we also create a cyclic process colorIndex to traverse the index. Get the color from the color array colorList using colorIndex. Finally we set colorSet to the spiral and the effect is as follows:
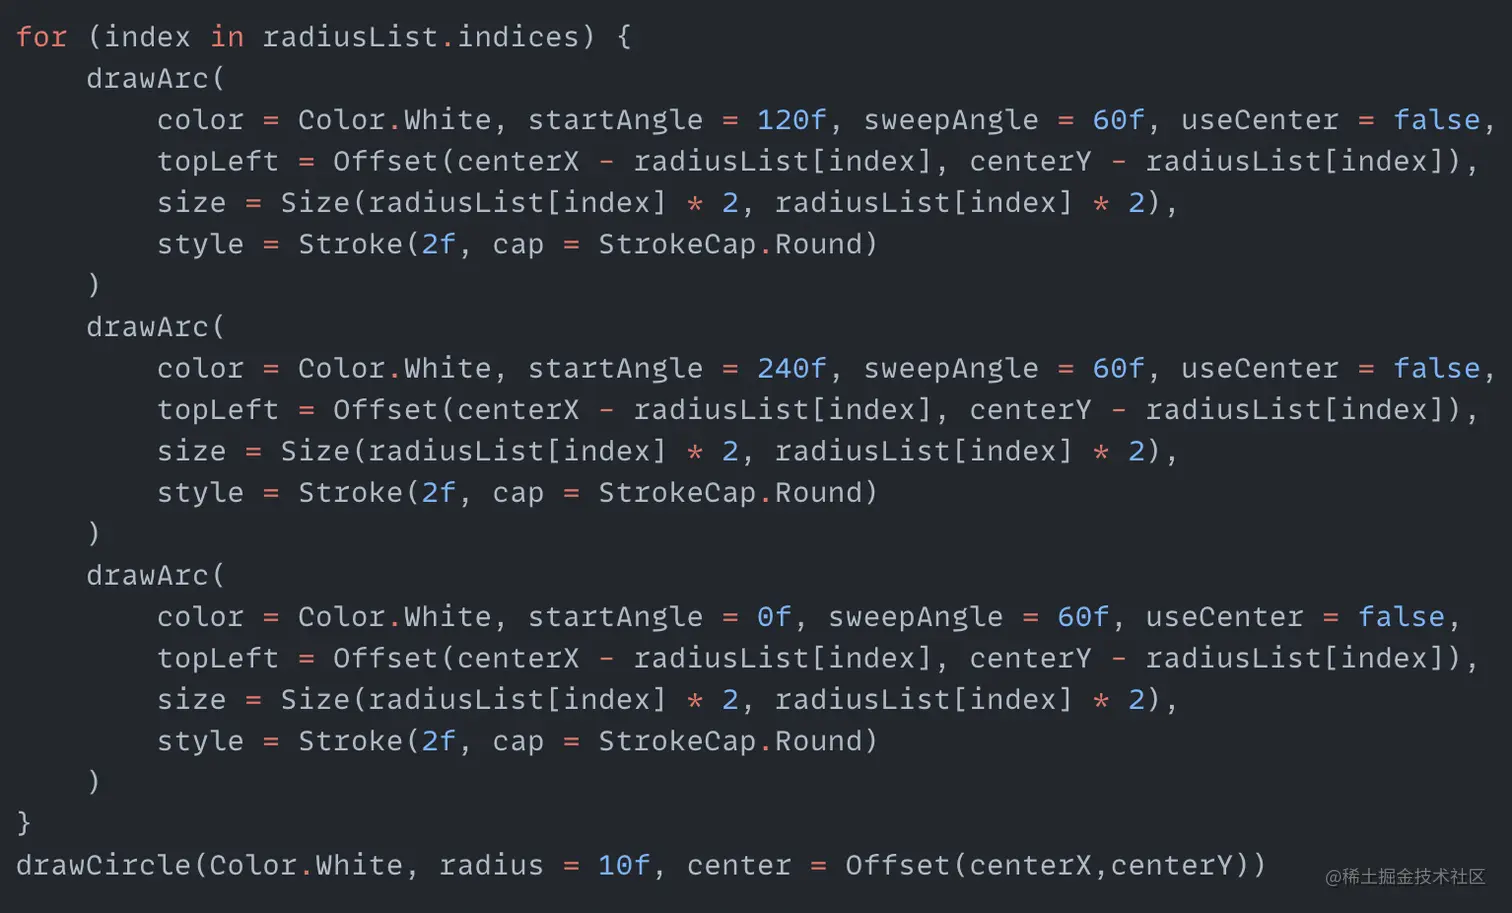
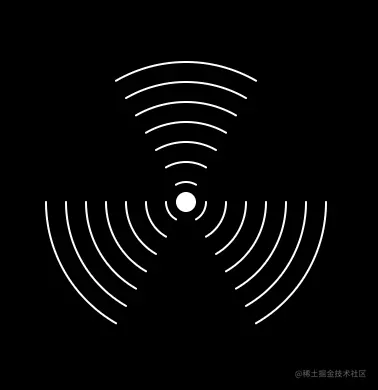
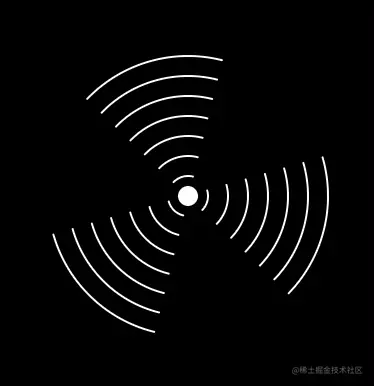
Radiation Effect
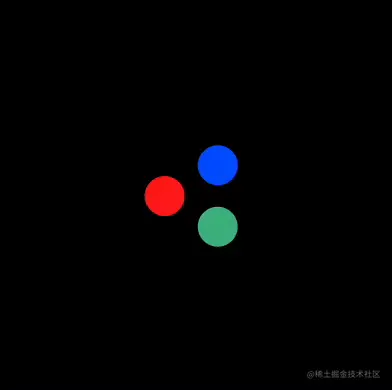
I got this effect by accidentally seeing a radiating logo online and making some modifications to the style. Radiating logos usually have a circle in the middle, surrounded by three fan-shaped sections. Like the image below:

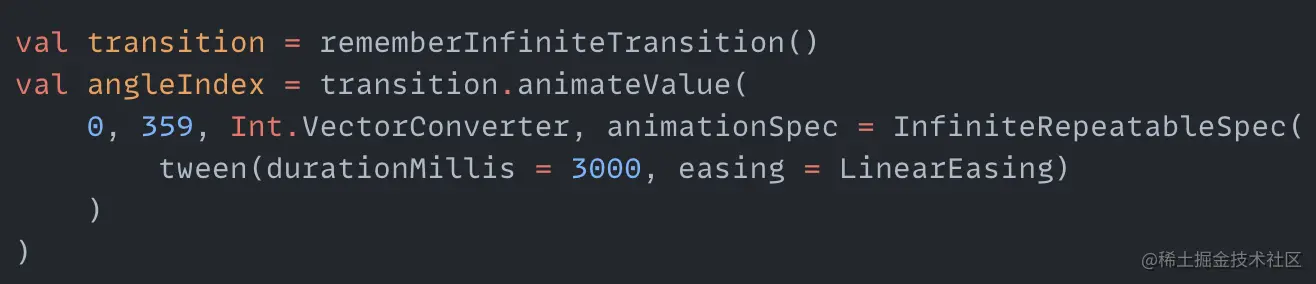
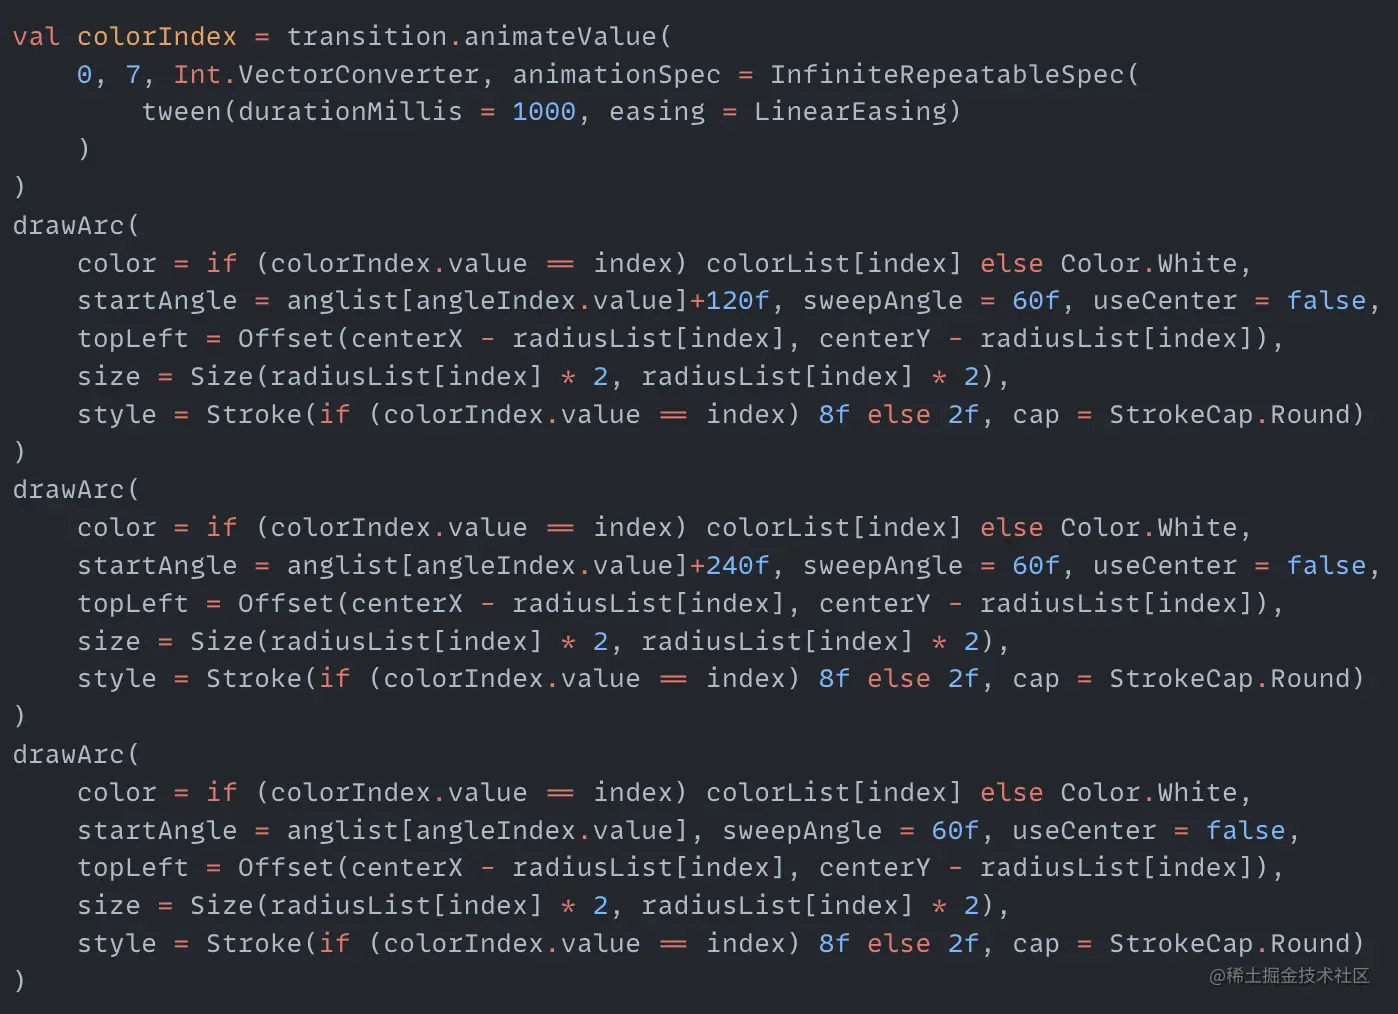
We make a slight modification here, replacing the solid fan shapes with several fan-shaped arcs, and changing the color from the innermost arc outwards every second. The color displayed in the middle circle is also kept consistent with the color displayed on the arcs. The whole thing also rotates clockwise. First, create the variables needed:
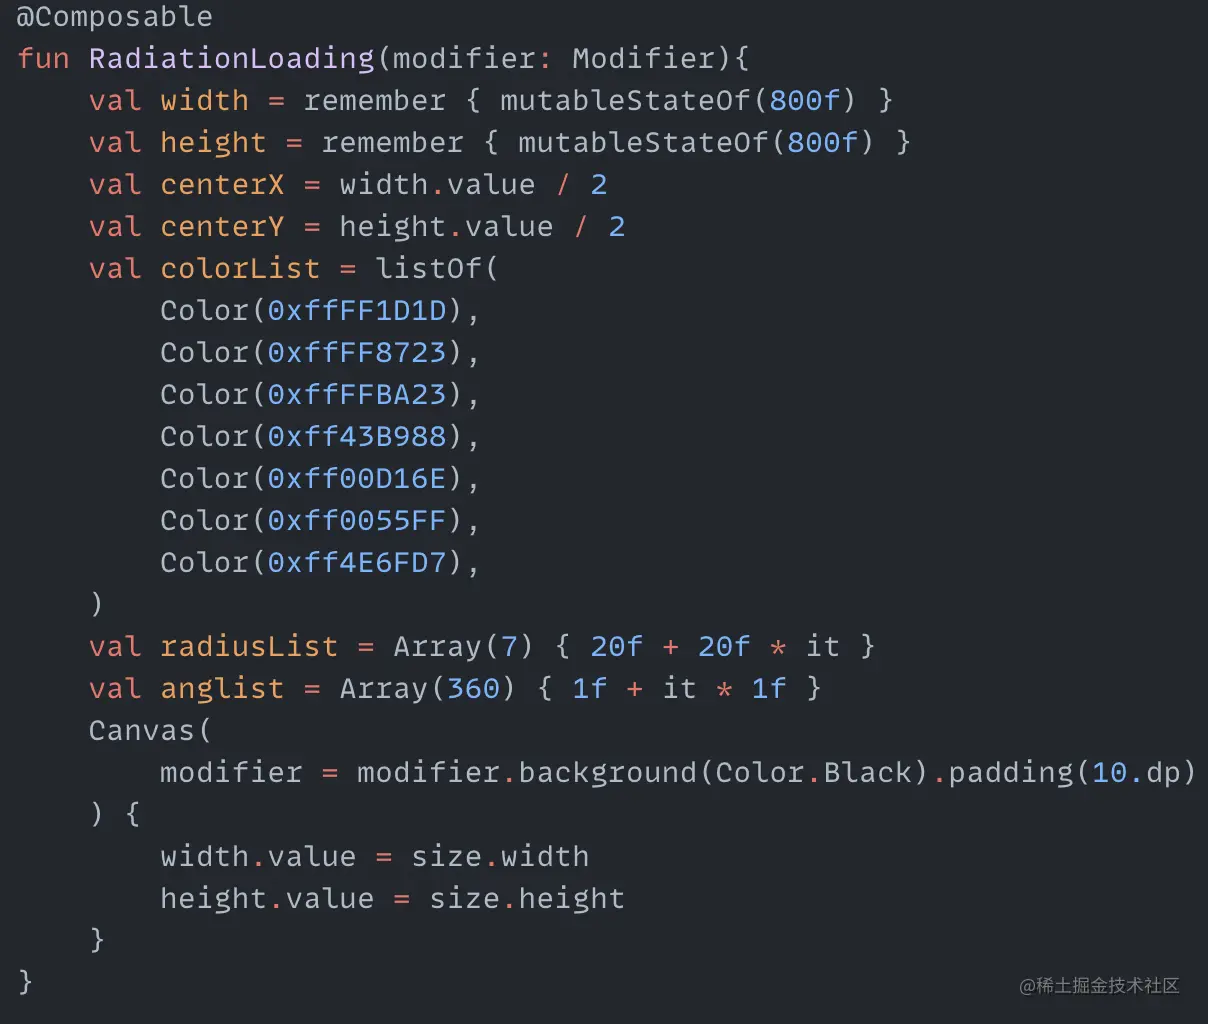
colorList is the color values to display. radiusList is the radius sizes for drawing all the arcs. anglist is used to save the angles that need to be rotated. With these we can draw the circle point and all the arcs:
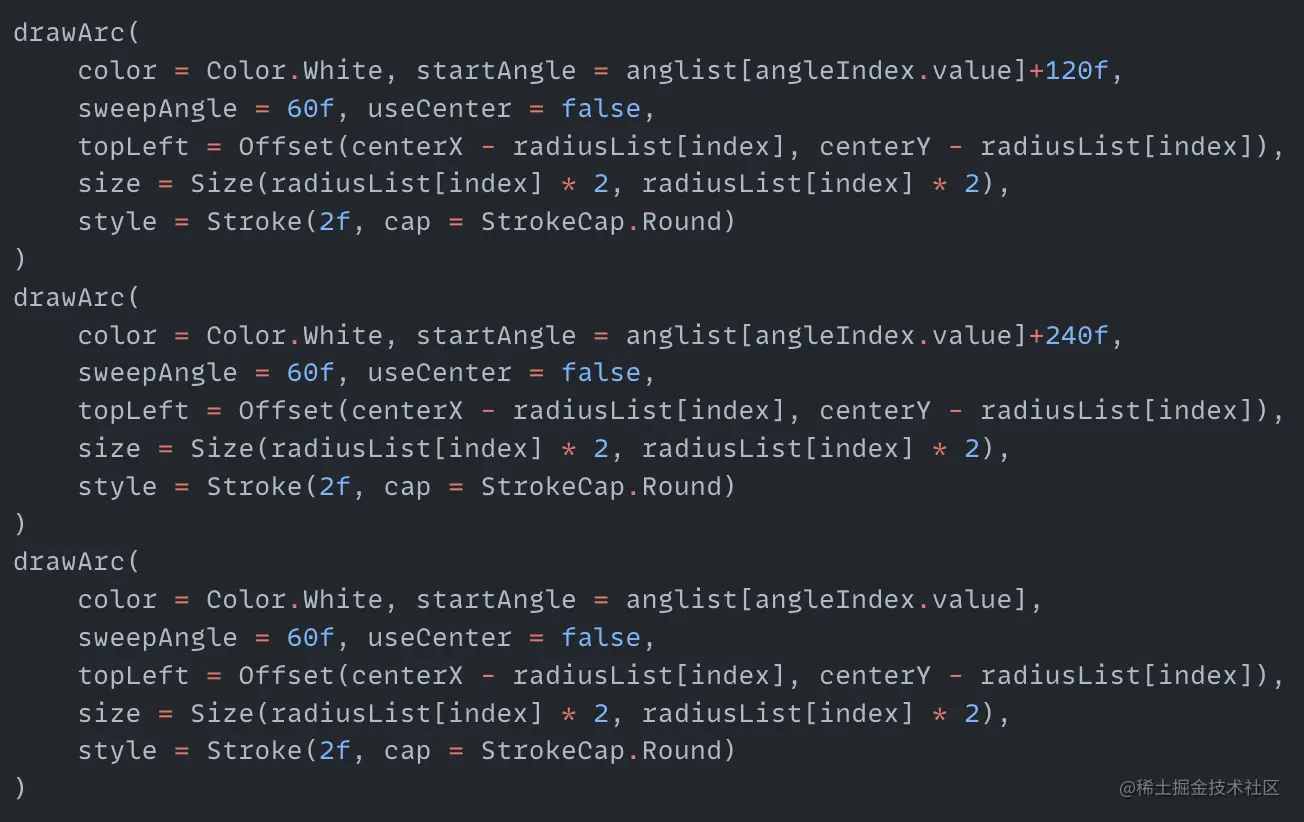
Now a radiation logo comes out. Next make this logo rotate. We've done similar things in the first animation, to rotate arcs we just need to constantly change the startAngle value. anglist stores the angles that need to be rotated for each point, we just need to constantly take out the corresponding angle from anglist and add it to startAngle:
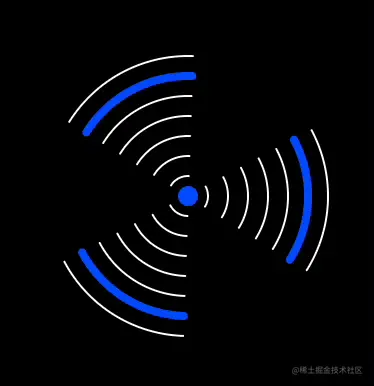
angleIndex is a process that loops through the index value of anglist. Modify the code that draws the arcs to add the angle value of the corresponding index to startAngle. We get a rotating radiation logo:
Then color the arcs and circle point. Here we also create a cyclic process colorIndex to traverse the color array index. Only when the arc radius equals colorIndex can the corresponding color light up and thicken a little. The rest of the arcs remain white. The code for this process is as follows:
The middle circle also needs to change color. When an arc lights up a color value, the circle displays the same color value. This is simple because we have colorIndex, we just need to set the circle to the color value corresponding to colorIndex:

The final effect is as follows:
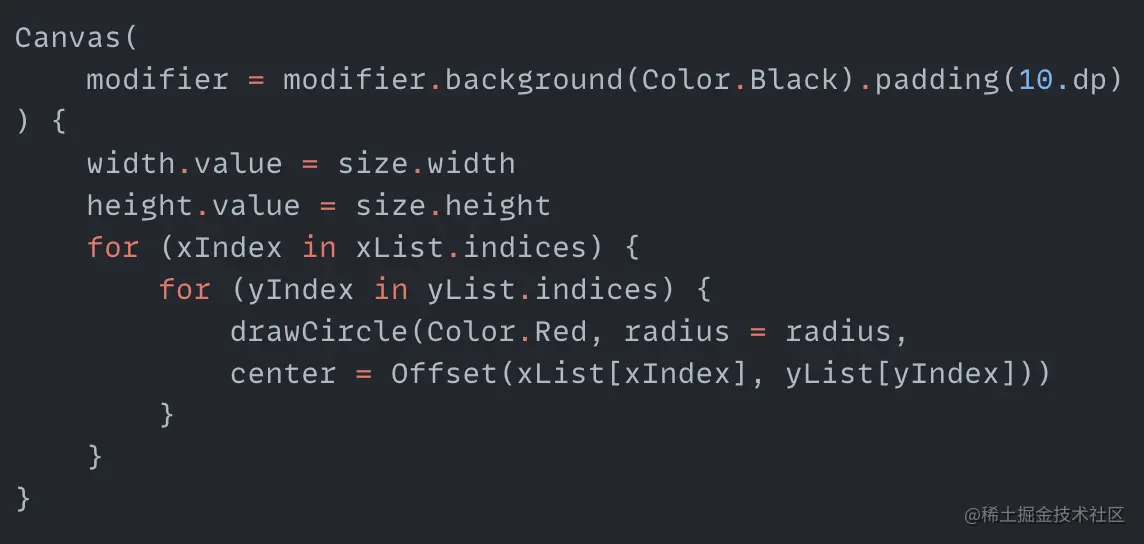
Floating n*n Dots
This effect is to draw (n-1) * (n-1) dots in an n*n grid layout, and then change the size of each dot in turn. First we draw these dots:
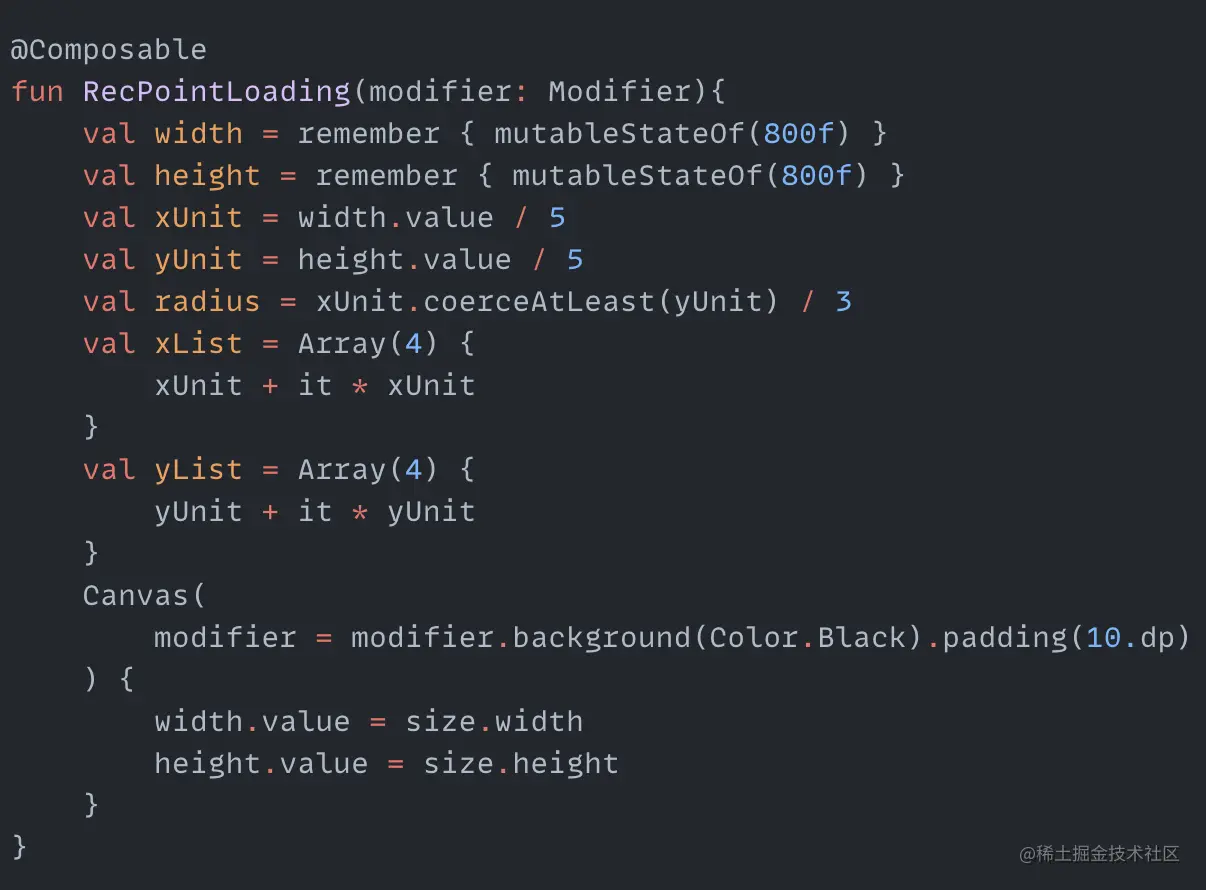
xUnit and yUnit are the sizes of the cells in the horizontal and vertical directions. The radius radius of each dot is one third of the minimum of these two values. Then create two Lists to store the x and y coordinates of each dot center, xList and yList. Finally traverse the lists to draw all the dots:
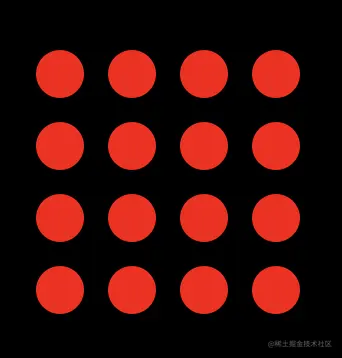
After drawing the dots, think about how to make these dots float. Since it's floating, it must be several dots moving at the same time to look like floating. So we need to find out which dots are moving at the same time. Let's look at the figure below:
What does this mean? It means that the dots passed through by each diagonal line are the ones that need to move at the same time. There is also a pattern between these points, which is that from the first diagonal line, the sum of the xy coordinates of the points passed is a fixed value, and then this value increases by 1 for each subsequent diagonal line. For example, for the first line, the sum of xy of the points is 0, for the second diagonal line, the sum of xy is 1, and for the last line, the sum of xy is (n-1) + (n-1). Then when traversing the lists, we can divide the dots' animations into maximum ranges by judging whether xIndex plus yIndex equals a certain value. In our demo it is a 4*4 dot graph, so the sum of xy of all diagonal line dots ranges from 0 to 6. We can create a cyclic animation to loop through the current maximum range value, then subtract the maximum range value from the sum of xy of each point, take the absolute value and divide by 10, which is the scaling ratio for each point. If the value obtained is greater than 1, keep it unchanged. After all that talk, the actual code is not much. Let's look at it:
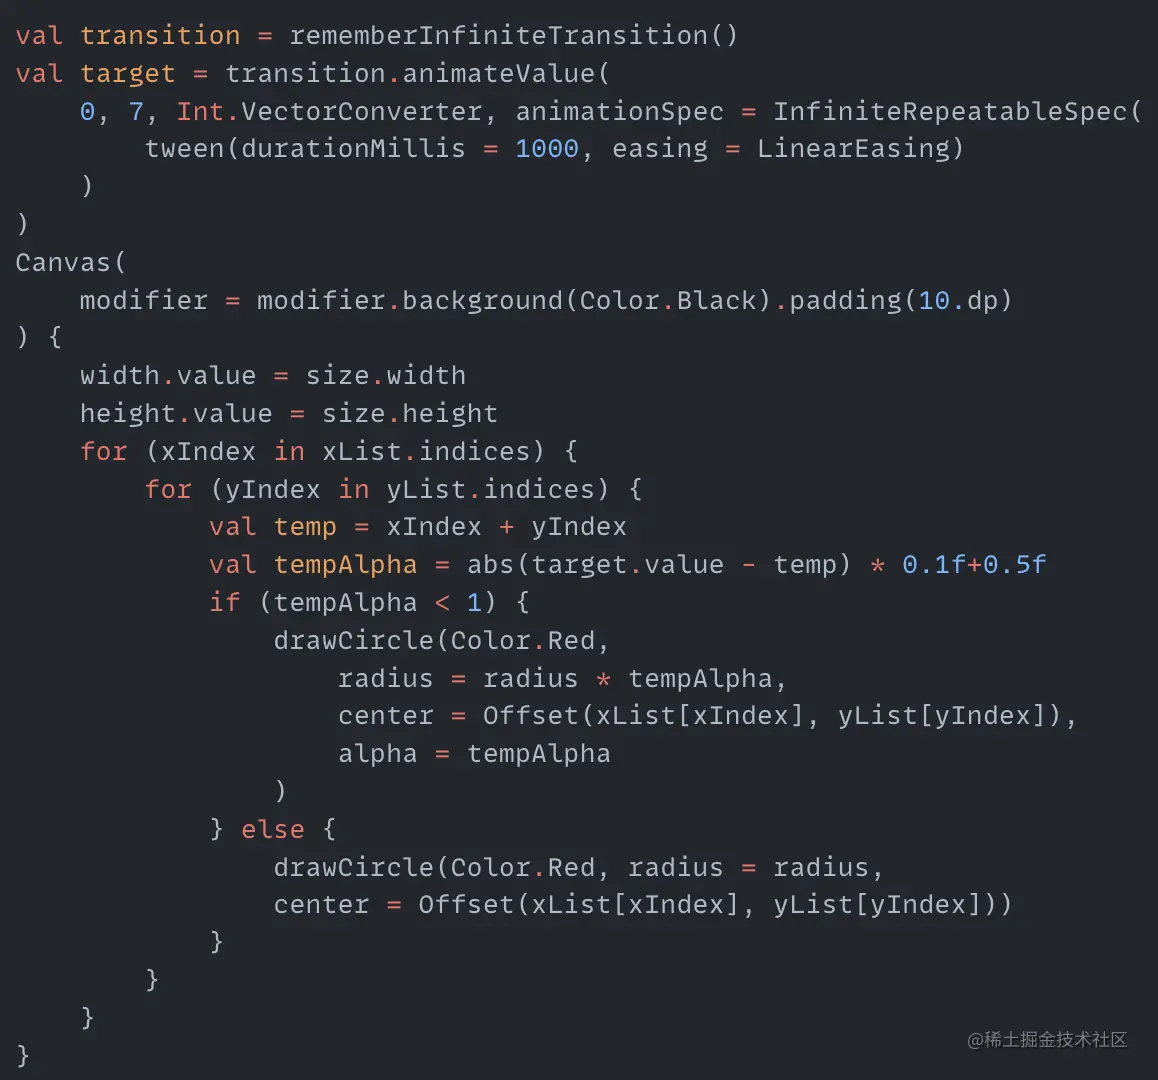
We can see that target is the created cyclic animation, whose value is the current maximum range value. In the loop, subtract it from temp, which is the sum of xIndex and yIndex. The final tempAlpha obtained is the scaling ratio of the point. When drawing the dot, apply this scaling ratio to the radius and opacity. Our final floating effect is done:
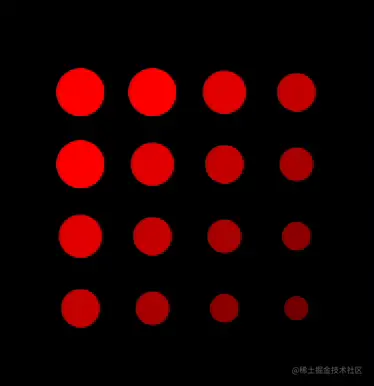
Jumping Balls
This effect divides the canvas into several parts, with two balls above and below in each part. The upper ball gradually reduces its y-axis height, and the lower ball gradually increases its y-axis height. This process is also cyclic. First create the variables needed:
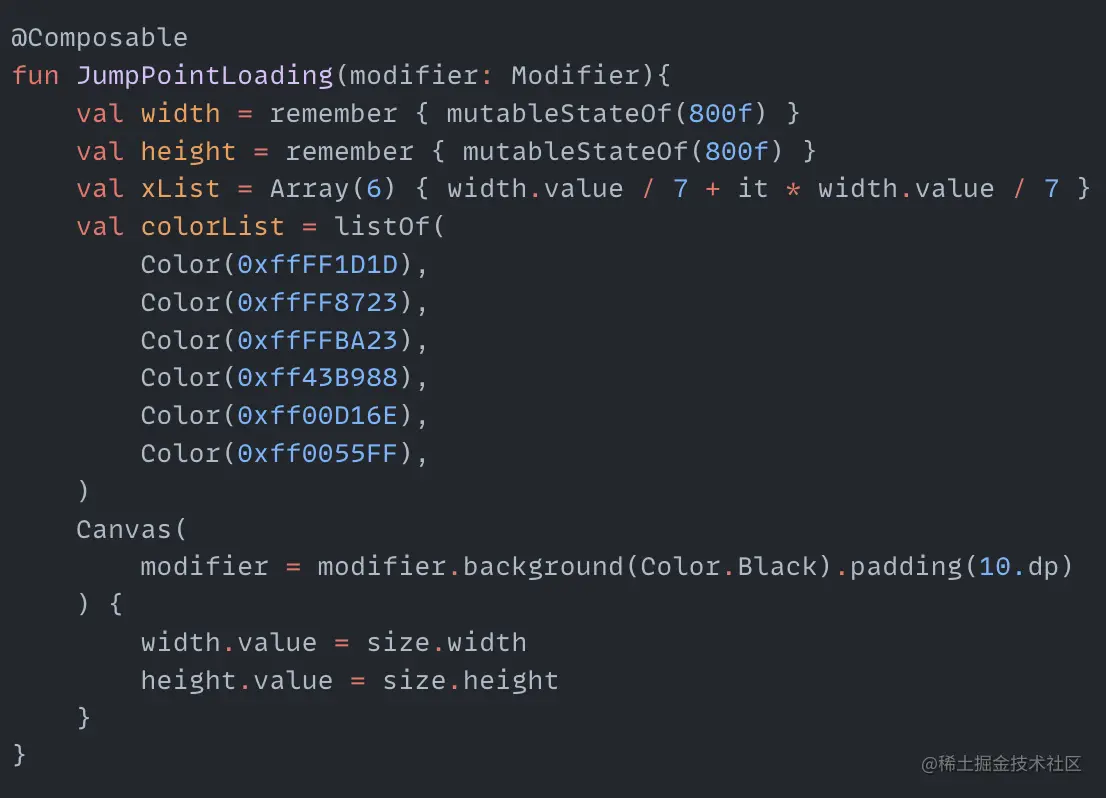
xList is the x coordinate of all balls, colorList is the color value of all balls. Draw the top and bottom rows of balls on the canvas:

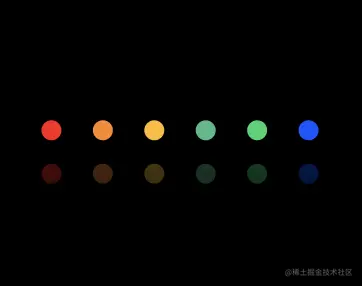
Note the bottom balls have some gradients and transparency, to make the bottom balls look a little like the shadow of the top balls. The effect is as follows:
Now make the balls move by adding an infinitely changing value to the y coordinate:
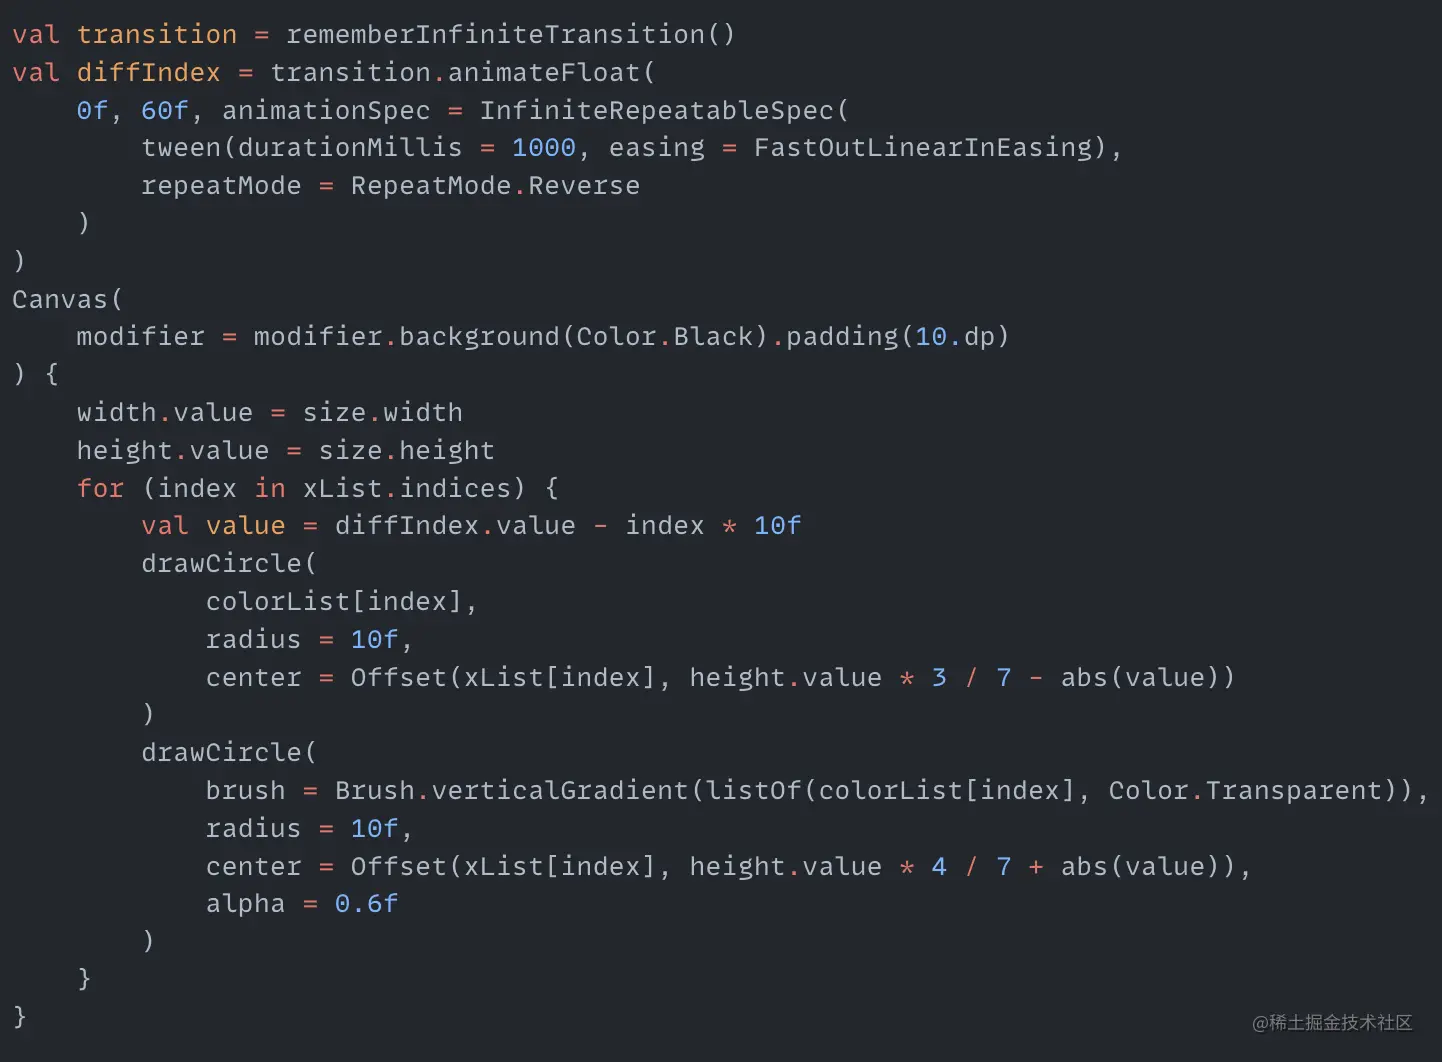
Create an animation process diffIndex that changes infinitely from 0f to 60f. In the traversal of xList, subtract diffIndex from index * 10f to get the absolute value of the change in ball height. The effect is as follows:
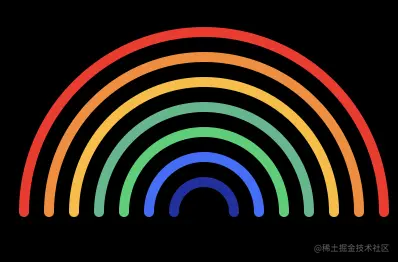
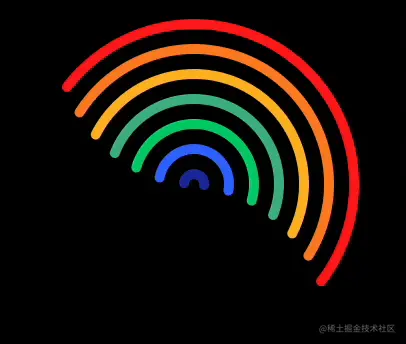
Rotating Rainbow
This effect is based on a rotating rainbow made with CSS that I saw online before. I've drawn rainbows before, but I haven't drawn a rotating rainbow where each arc rotates at a different rate. So I also want to try to implement one with Compose here. First, create the variables needed to draw the rainbow:
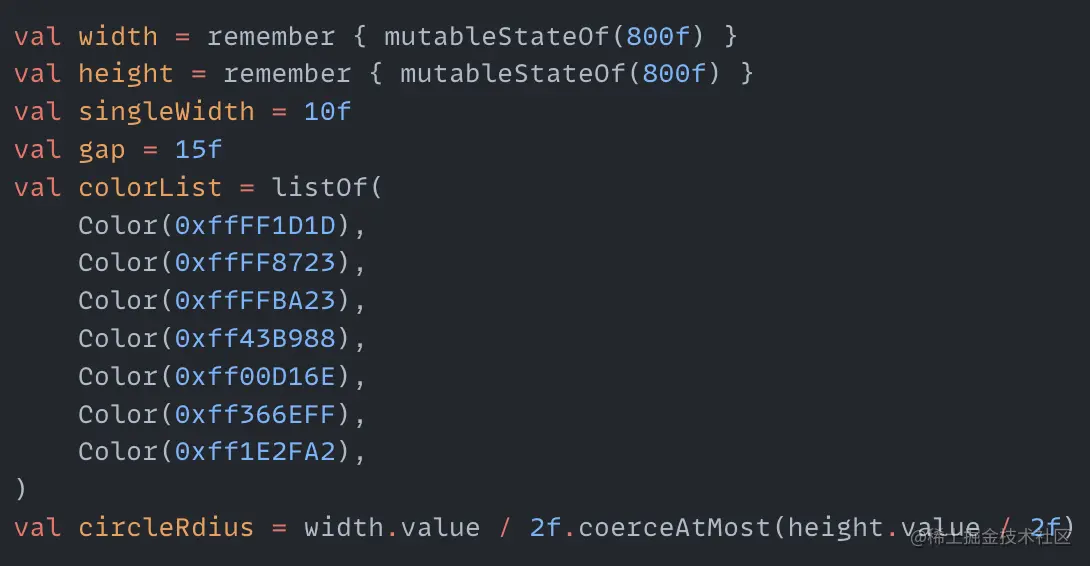
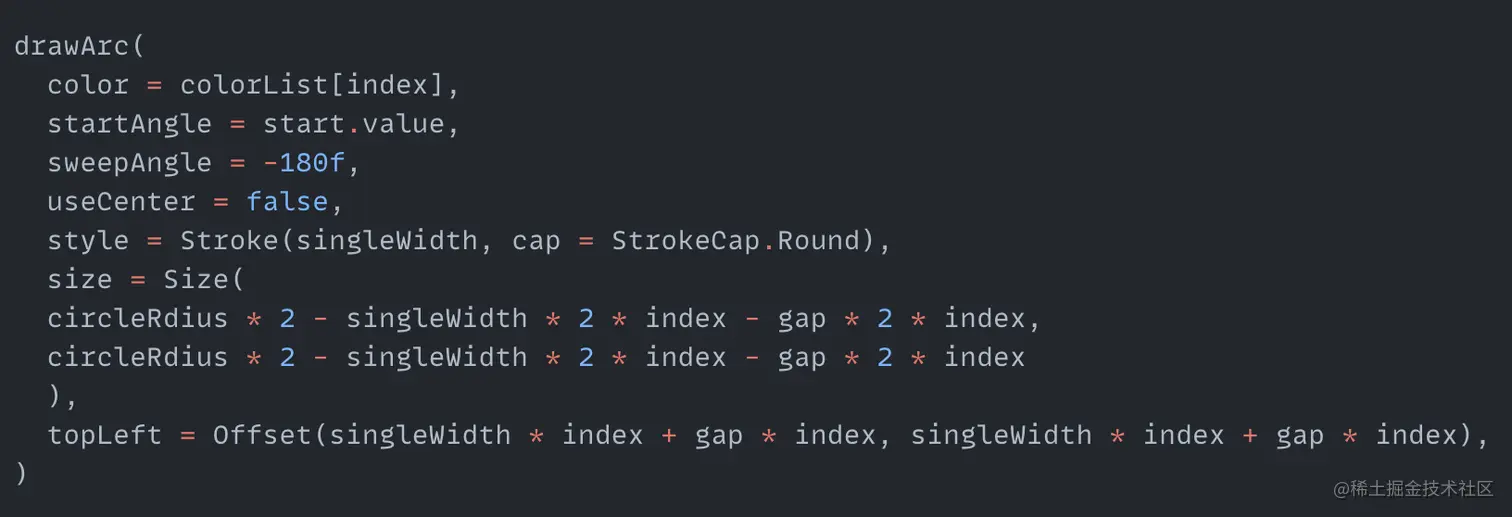
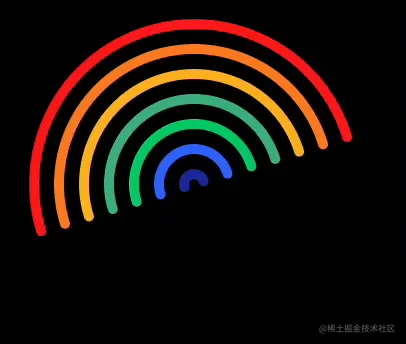
singleWidth is the width of a single rainbow arc. gap is the gap between rainbow arcs. colorList is the color of all rainbows. circleRdius is the radius of the largest rainbow arc. Then we can traverse colorList to draw the seven rainbow arcs:

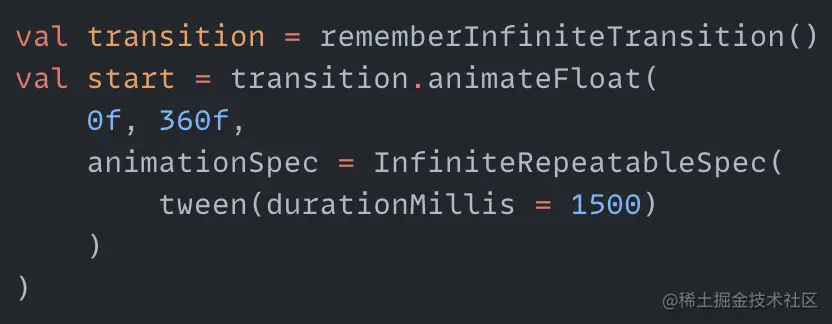
Next, make the rainbow rotate. Rotating arcs is an operation we've done many times before, which is to infinitely change the startAngle value. So create an animation that infinitely changes from 0 to 360 here:
Then pass start to the startAngle parameter of drawArc, and the rainbow can move:
After moving, add some effects to it. Now all rainbow arcs start rotating at the same time using the start animation value. Now we want the outermost one to rotate first, followed by the second one, and so on. So each rainbow arc needs an animation variable now. Create six more here:
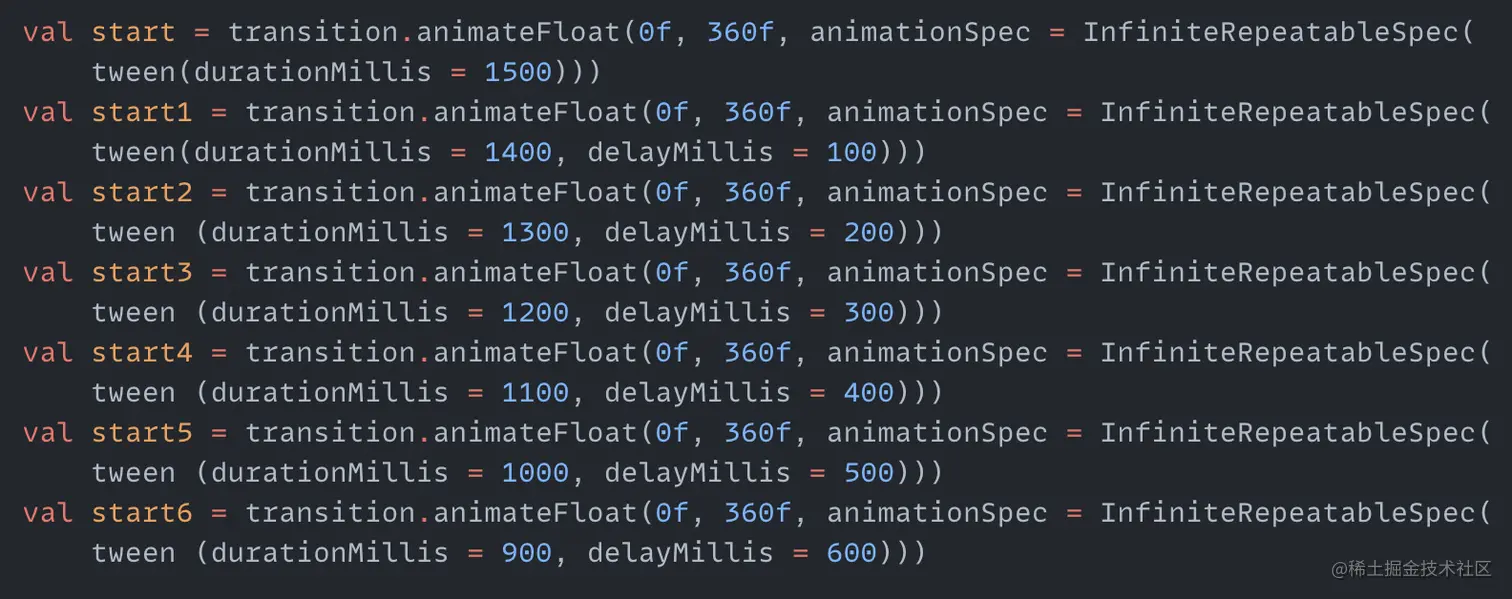
You can see the only difference between the six new animation variables and the first one is the added delay start parameter. The total animation time is still 1500 milliseconds. This can ensure that each rainbow arc has a different start time but ends rotating at the same time. Let's add these new animation variables to the code that draws the rainbow:
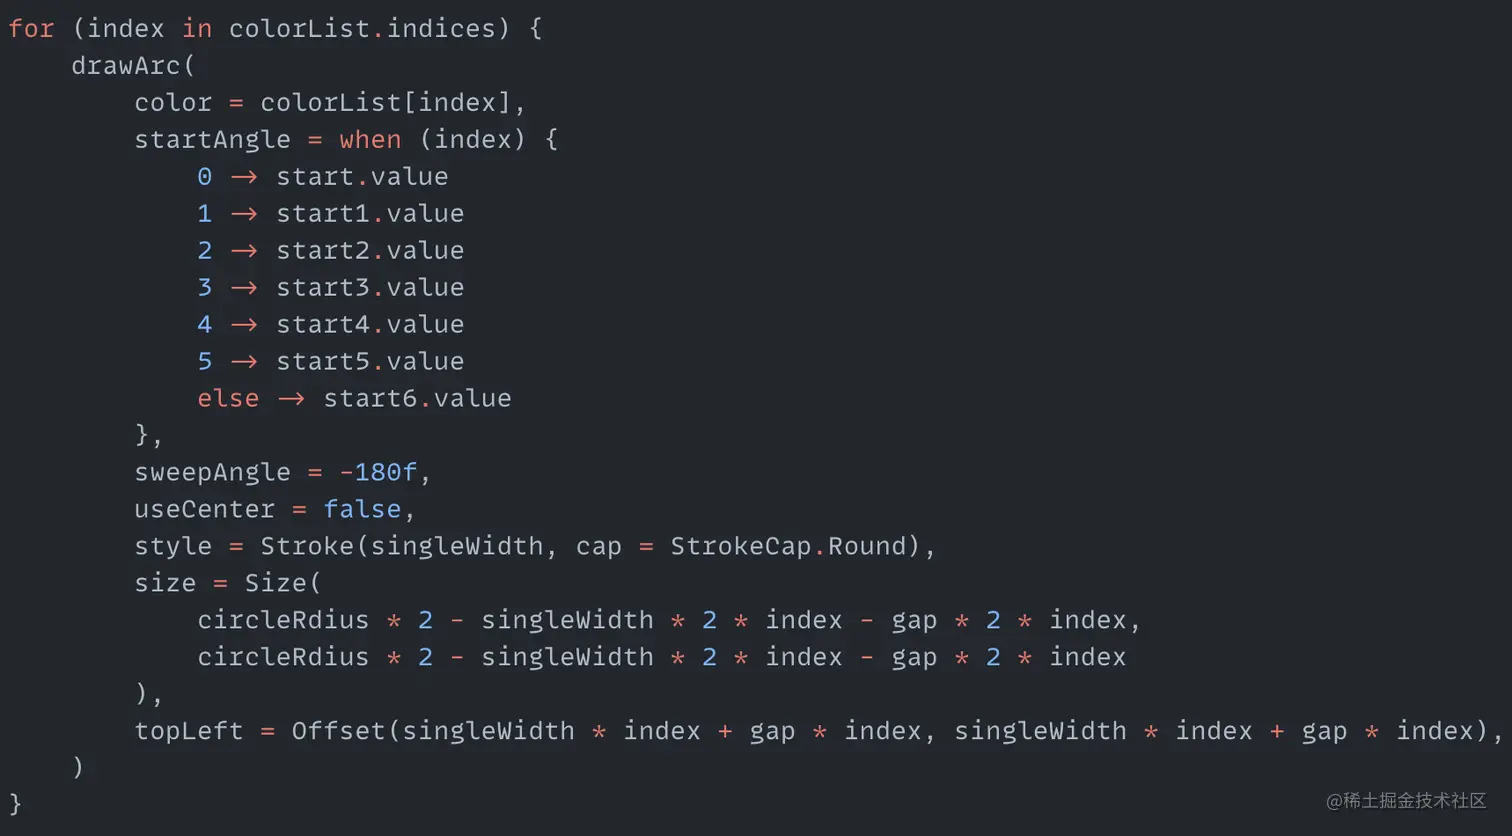
Different animation variables are now used based on the index value. Let's see the effect again:
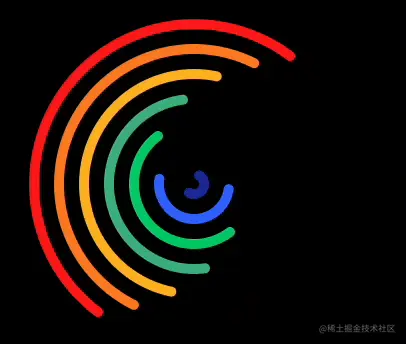
You can see the start times are different for each rainbow arc due to the added delay. Then add another effect that each rainbow arc will overshoot the final value when finishing rotating, and then go back to the final target value. To do this, we need to change the AnimationSpec in InfiniteRepeatableSpec from TweenSpec to KeyframeSpec. Then KeyframeSpec can set a value larger than the target value at a certain time point within the animation duration, and then reach the final target value at the end of animation time. So modify the seven animation variables:
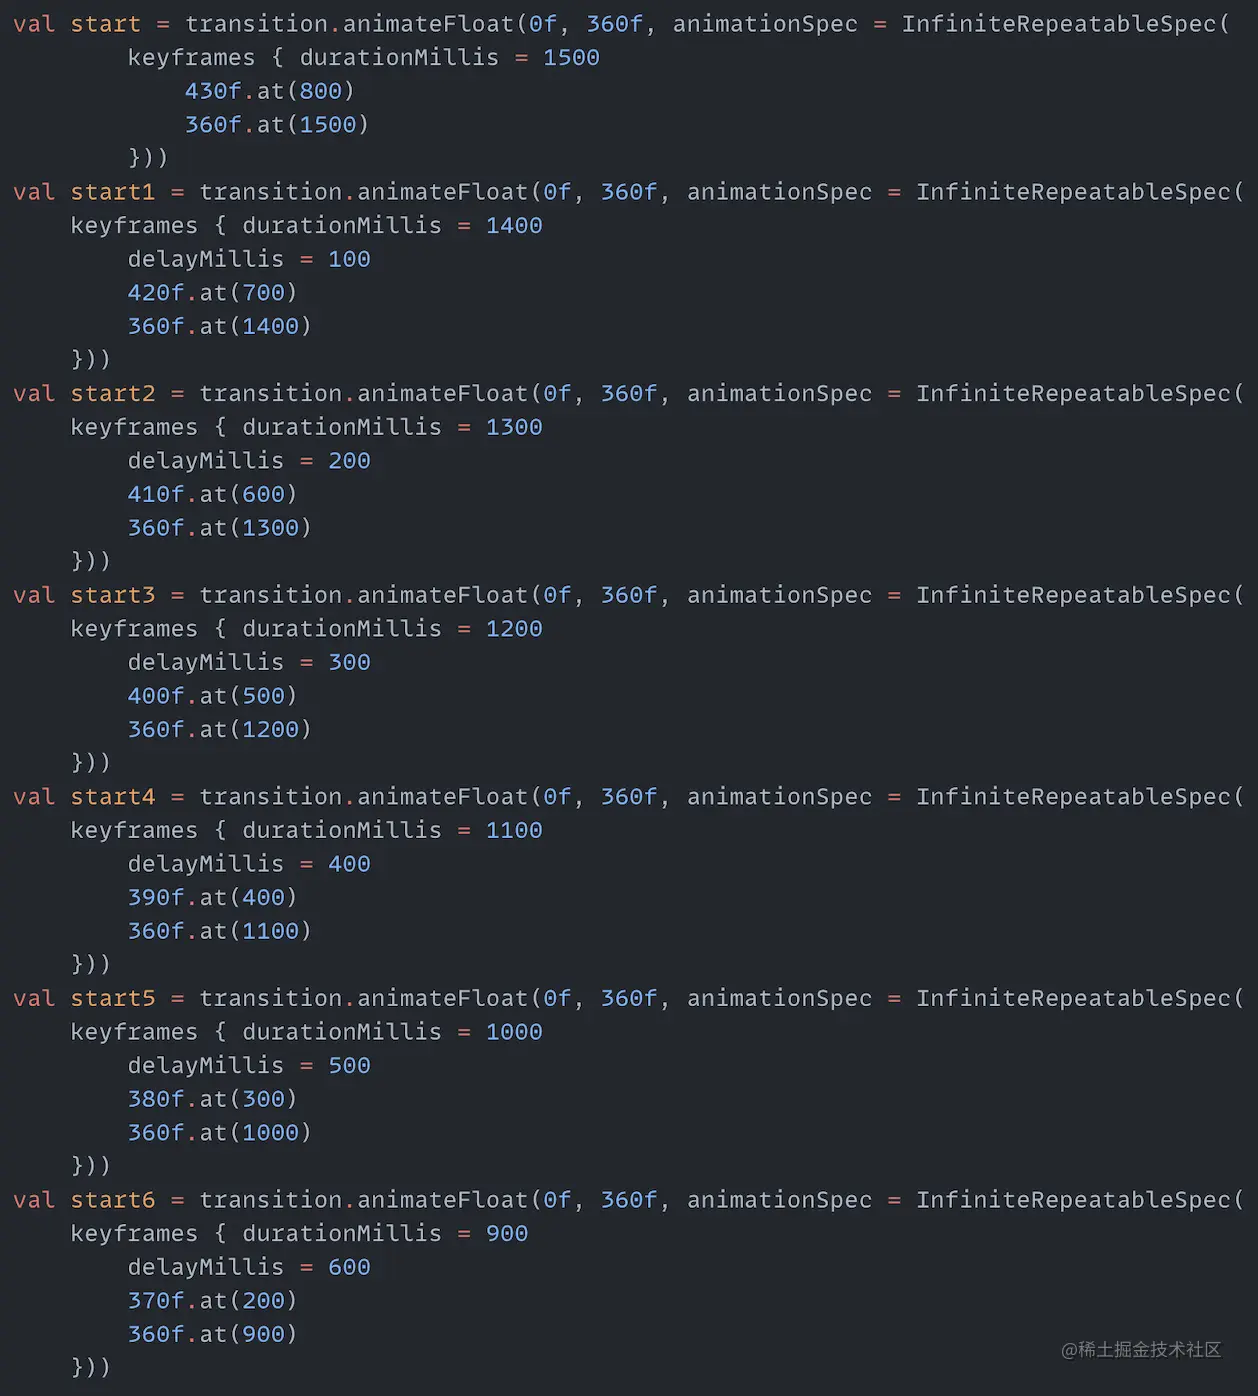
Each animation now has KeyframeSpec set. Let's see the effect again:
Summary
Some of these animations are copied from what others have implemented with CSS that I saw online, and some are figured out by myself when free. None of them use the animation operators provided by Modifier to implement, but are all done using the animation API of Canvas and Compose. I believe after reading this article and the previous one, friends who use Compose will be able to implement some not too complex animations by themselves in Compose projects when encountering such needs, instead of asking designers for cutout animations. Isn't it better to rely on yourself than on others?

Comments